Home Blog Page 3

How To Fix ‘Error Loading Player No Playable Sources Found’ Guide

Error
Error

There is no doubt that it becomes frustrating for everyone when the error pops up in between the task. Error Loading Player: No Playable Sources Found is one such error that gives you trouble.

There are many users facing the same, and there is no need to get worried if you are also the one, as you will surely be able to solve the issue after applying the fixes we are going to discuss below.

There are different reasons behind this error and here, we are going to solve out this error with every possible way out there. So, before beginning let’s have a clear understanding of the reasons behind the occurrence of this error.

Error
Error

Why Does Error Loading Player No Playable Sources Found Error Occur

Error Loading Player No Playable Sources Found Error occurs mostly during streaming videos and audios on your browser even in the presence of an excellent internet connection. There are several reasons behind this error, most common among them are:

Read Also:

  1. 500 Internal Server Error
  2. IRQL_NOT_LESS_OR_EQUAL
  3. Origin Online Login Is Currently Unavailable

Browser’s cache

Your browser’s cache might be the reason behind this error. If your browser is overloaded with the collection of data, then your browser will stop you from playing video and audio, and this leads to the error to occur. In such a case, clearing your browsing data can help you in resolving the issue.

Outdated versions of Browser

If you are using an outdated version of the browser, then the error is obvious to occur as it will not allow new functions of your application to work. In this case, you need to update your browser to the newest version available.

Older version of Flash Drive

Using an older version of the flash drive is the most common reason behind this issue. So, in this case, the user will not be able to stream online videos, and upgrading it to a newer version can help in resolving the issue.

How to Fix Error Loading Player: No Playable Sources Found Error

Fixing the Error Loading Player: No Playable Sources Found error is an easy task, what you need to do is to simply follow the solutions below and apply the one which suits you the best.

Method 1: Allow Flash To Run

This method is the most useful one in solving this error. When you visit a website that uses Flash, you see a “Plugin blocked” message at the right side of Chrome’s address bar. In this scenario, you just need to allow the flash to run which can be done by changing the settings. Follow these instructions to proceed further:

Step 1: Open Chrome and click the lock icon at the left side of the address bar, select the Site Settings option.

Step 2: From the Permissions section, find Flash, and click on Ask(default). A drop-down menu will appear, choose the option Allow.

Now, your browser can use online resources that use Flash Player. Hopefully, this will solve the error as this is the most effective method. If you are still facing the same issue, try out the next method.

Method 2: Reinstall Adobe Flash Player

Uninstalling and then reinstalling the Adobe Flash Player can help in resolving the issue. Follow the below steps to do so:

Uninstalling

Step 1: Press the Start menu and search Control Panel. Open it and from the Programs section, select the Uninstall a Program option.

Step 2: Right-click on Adobe Flash Player and select the Uninstall option.

This will uninstall the Adobe Flash Player from your PC, now you need to install it again.

Re-installing

Step 1: Go to the browser and type Adobe Flash Player. Access the Adobe official web page and download the latest version of Flash Player for your version of Windows.

Step 2: Download the software and click on the downloaded file to run the installer. Now, follow all the on-screen prompts and complete the installation process.

Now, restart your PC and check whether the issue has been resolved or not.

Method 3: Clear Browser History

The issue can also be resolved by clearing the browser’s history, as overloading can stop you from streaming videos and audios. Clearing the browser’s history can be done by following the below steps:

Step 1: Open Chrome, and click the three dots next to your profile image. Choose the option History and then again History from the sub-menu, or you can simply press Ctrl + H to open it.

Step 2: Select Clear browsing data option from the left panel and you will get the choice to clear your browsing data for a range of dates and times. To delete all your history, choose the option all time. Click on Delete and the item will get deleted from your Chrome history.

If clearing the history does not prove useful in removing the error, you are recommended to try out the next method.

Method 4: Update Google Chrome Browser

Updating the Google Chrome Browser from an older version to a newer one can help you in resolving the issue. If you are also using an older version, then you are recommended to update it by following the instructions below:

Step 1: At the top-right corner of chrome, you will find the Customise menu icon, it looks like three vertical black dots, click it.

Step 2: Click on Help and then About Google Chrome option. As soon as the About Chrome windows open, it will automatically start to check if there are any updates available for Chrome. If updates are available it will start to download them itself and you don’t need to do anything to start this process.

Step 3: After completion of the downloading process, install the updates. Once this is done, click the Relaunch button to complete this process. Clicking it will restart Chrome.

Step 4: After relaunching Chrome, you will have the latest version and now it will tell you that Google Chrome is up to date.

This will update your Google Chrome browser and hopefully, the error will disappear after this.

Method 5: Add Flash Exceptions

Using flash exceptions can help in getting rid of the error. You just need to follow the instructions below in order to proceed:

Step 1: Open the browser and click on the customize menu icon. Select Settings from the menu. In Chrome’s Settings page, scroll down to the bottom of the page and click the Show advanced settings option.

Step 2: Under the Privacy section, click the Content Settings option and scroll down to get the Flash option. Alternatively, you can type chrome://settings/content in the address bar to reach the page.

Step 3: To manage the list of websites that you have given permission to run Flash, click the “Manage Exceptions” button under Flash. You will then get a list of websites and here you can specify the websites that are allowed to run Flash.

Hopefully, this method has helped you in fixing the issue. But, if the issue still persists, there is no need to worry as there are many more solutions to fix the issue. So, move on to the next method.

Method 6: Update Windows to Latest Version

If none of the above methods helped in getting rid of the issue, then it is highly probable that this problem is due to an older version of Windows. In such a condition, you need to update Windows to the latest version. For doing so, go through the instructions below:

Step 1: Go to Settings by pressing Windows key + I hotkey. Click on Update and Security.

Step 2: Click on Check for Updates option. This will check for available updates for your PC. If updates are found, they will be shown. Downloading and installing updates will begin automatically.

After completion of the process, restart your PC and check whether the issue has been resolved or it still persists.

Method 7: Enter Safe Mode Using Networking

Safe mode is the best way to resolve issues that interferes with the normal functioning of your PC. It is considered as one of the most effective methods in dealing with such kind of errors.

Many users find it helpful in solving this issue and regaining normal working. So, try to get rid of the error by entering the Safe Mode using networking, and here is how to proceed:

Step 1: Open the Run window by pressing Windows key + R. Type msconfig and press Enter.

Step 2: Click on the Boot tab and from the Boot Options section, check the Safe Boot option. By doing so, the options below it will get activated. From the options, check Network and press Ok to save the changes.

Now, restart your PC and check whether the error pops up or not. If it still persists, try out the next method.

Method 8: Check Out for Viruses

If your website contains some virus, then it is obvious for this kind of errors to occur and halt the functioning, making you unable to stream videos and audios with the Error Loading Player: No Playable Source found an error.

If this is the case, we recommend you to use antivirus software and firewall to remove the virus on the website you are using and hence solving the issue.

If you don’t want to use the antivirus and firewalls, you can temporarily disable them or you can also uninstall them after removing the virus.

Method 9: Turn off ActiveX Filtering (Only for Internet Explorer Users)

If you are using Internet Explorer, then try to turn off ActiveX Filtering, as many Internet Explorer users are able to get rid of this error by doing so. Here is how to turn off the ActiveX filtering:

Step 1: Open Internet Explorer and select the gear icon located at the upper-right corner of the window. Select Safety from the drop-down menu.

Step 2: When the sub-menu appears, locate the option ActiveX Filtering. If there is a checkmark next to it, then ActiveX Filtering is enabled. Click on the checkbox to uncheck the option. This will turn off the ActiveX filtering.

By doing so, you can turn off the ActiveX filtering and this will help you in getting rid of the error.

Method 10: Switch to a different internet browser

It might be possible that the trouble is specific to the browser you are using. If your browser is not supporting or giving access to the Flash Player, then the error is obvious to occur.

If it is so, then try using a different internet browser to solve this issue. Moreover, try using reliable browsers such as Google Chrome (recommended), Mozilla Firefox, Internet Explorer and Opera.

If you find videos and audios working properly with some different browser, then it is clear that the browser you were using before was either not supporting the Flash Player or contains some bugs.

Method 11: Launching in Incognito Mode

If you have reached so far without being able to solve the issue, then you are left with only one option i.e. try opening your website in Incognito Mode. It sounds absurd but using Incognito mode is the simplest and the most effective method in resolving this issue.

There might be some third party extensions halting the functioning of the Flash Player, and hence making you unable to stream videos and audios on your browser. When you open your website in Incognito Mode, it will disable all third-party extensions.

If everything works fine, then it is clear that the problem is within the extensions, and disabling them one by one will help you in getting rid of this issue. After removing all the extensions, restart your PC to save the changes.

Here is how to launch Incognito Mode:

Step 1: Open Chrome on your PC. At the top right corner, click the customize menu with the vertical black dots.

Step 2: From the options, select the New Incognito Window option. A new window will open up.

There is also use a keyboard shortcut to open an Incognito window for Windows, Linux, or Chrome users i.e. Press Ctrl + Shift + N.

Read Also:

  1. Chrome Won’t Open
  2. Kernel Security Check Failure
  3. ERR_QUIC_PROTOCOL_ERROR

Conclusion

Finally, we have discussed all the possibilities as well as relevant methods to solve the issue. Hopefully, you will be able to get out of the error just like all other users who have been benefitted by following these methods.

Moreover, if you are still unable to fix the issue, then we recommend you to contact an experienced technician for further help.
How To Fix ‘USB Ports Not Working’ Error

USB Ports Not Working

USB (Universal Serial Bus) ports are an essential component of modern computers, allowing for the connection of various devices such as keyboards, mice, external hard drives, and smartphones.

However, encountering issues with USB ports can be frustrating, particularly when you experience the “USB Ports Not Working” error. This error can disrupt your workflow and affect your ability to use peripheral devices effectively.

In this comprehensive guide, we will explain the meaning of the “USB Ports Not Working” error, its significance, what causes it, and effective solutions to help you resolve this issue and regain the functionality of your USB ports.

USB Ports Not Working

Understanding the USB Ports Not Working Error

Before we delve into the details, let’s break down the error message itself:

  • “USB Ports” refers to the physical connectors on your computer that allow you to connect external devices via USB cables.
  • “Not Working” indicates that the USB ports are unresponsive or malfunctioning, preventing the proper functioning of connected devices.

In simple terms, the “USB Ports Not Working” error occurs when one or more USB ports on your computer cease to function correctly, making it impossible to use connected peripherals or transfer data via USB.

Read Also:

  1. 0x80073712
  2. How To Enable Adobe Flash Player
  3. How to Change Brightness on Windows 10

Common Symptoms of the Error

When you encounter the “USB Ports Not Working” error, you may experience the following symptoms:

  1. Error Message: The primary symptom is the lack of response from the USB ports when you connect devices, often accompanied by an error message in the device manager or notification area.
  2. Inoperative USB Devices: Connected USB devices such as flash drives, keyboards, or mice may not work when plugged into the affected USB ports.
  3. No Device Recognition: Your computer may fail to recognize any devices connected to the malfunctioning USB ports.
  4. Intermittent Connectivity: USB devices may intermittently connect and disconnect from the USB ports, making them unreliable for use.

Now that we understand the symptoms, let’s explore the potential causes of the “USB Ports Not Working” error.

Possible Causes of the Error

To effectively troubleshoot and resolve this error, it’s crucial to identify its underlying causes. Here are some common reasons behind the “USB Ports Not Working” error:

  1. Driver Issues: Outdated, corrupted, or missing USB drivers can lead to problems with USB port functionality.
  2. Physical Damage: Physical damage to the USB ports or connected devices, such as bent or broken pins, can cause connectivity issues.
  3. Power Supply Problems: Insufficient power supply to USB ports, particularly in laptops or low-power USB hubs, can result in devices not working correctly.
  4. USB Selective Suspend Feature: Windows has a feature called “USB Selective Suspend” that can turn off USB devices to save power, but it may lead to connectivity problems.
  5. Malware or Virus Infections: Malicious software can interfere with USB port functionality.
  6. System Errors: System file corruption or errors within the Windows operating system can affect USB port operation.
  7. BIOS/UEFI Settings: Incorrect BIOS or UEFI settings may disable USB ports or limit their functionality.

Now that we’ve identified the potential causes, let’s explore the solutions to fix the “USB Ports Not Working” error:

How to Fix USB Ports Not Working

Now let’s have a look at how you can fix the issue of USB Ports not working on the laptop.

Method 1 – Restart Your PC

Most of the time, a simple step of restarting your device can fix some minor and major issues. You just have to remove your USB device from the laptop and after some minutes, restart your laptop.

Now put your USB again in the USB slot of your laptop and check if your issue has solved. If the problem is solved then congratulations but if not then move on to the next solution.

Method 2 – Make Sure USB Ports Are Not Damaged

Examine the USB port of your laptop in order to find out if there is something stuck in the port. If you find out something then remove it with care.

In case you find out that port is looking alright then there must be not any problems inside it. Now put your USB inside the port and move it slightly up and down. If it is moving freely then your post must have a problem.

Method 3 – Check Device Problems

If you have a second laptop available to you at the time then put your USB in it’s USB port. If it is working on the second laptop, it means your USB has an issue.

But if it is not working even in that port, then there must be an issue in your USB device. In case, you don’t have any other laptop but you have another USB then you can try putting it.

Method 4 – Adjust Power Management

Your laptop has a feature to turn off your USB controllers when you are not using them in order to save power. It again turns ON when you need to work on it. But sometimes due to some errors, the Windows becomes unable to turn your USB controller ON.

Follow the steps mentioned below in order to set the Power Management:

Step 1 – First of all you have to invoke your Run Box and to do so you have to look for the Windows key and R key present on your keyboard and press them together. Now a box will appear in which you have to put the command devmgmt.msc and click on OK.

Step 2 – Now a drop-down list will appear on your screen. In order to expand it you have to click on the Device Manager window and then scroll down and double click on the option Universal Serial Bus Controllers.

Step 3 – A list will be appeared from which you have to click on the option USB Root Hub and then click on Properties.

Step 4 – Now you have to select the tab Power Management. Then you have to untick the option Allow the computer to turn off this device to save power and then select the OK option.

Step 5 – Now you have to perform the same steps for 3-4 times for all the USB devices present in your USB Serial Bus Controllers.

After performing the steps you have to take a look that your USB ports are now working properly or not. If the problem is solved then congratulations but if not then move on to the next solution.

Method 5 – Reinstall USB Drivers

In order to fix the issue USB port not working, you can uninstall all the USB devices present in your laptop with the help of Device Manager. And then your Window will install them again after rebooting the device.

To do so you have to follow the below-mentioned steps:

Step 1 – First of all, you have to invoke your Run Box, and to do so you have to look for the Windows key and R key present on your keyboard and press them together. Now a box will appear in which you have to put the command devmgmt.msc and click on OK.

Step 2 – Now a drop-down list will appear on your screen. In order to expand it you have to click on the Device Manager window and then scroll down and double click on the option Universal Serial Bus Controllers.

Step 3 – A list will be appeared from which you have to click on the option USB Root Hub and then click on the Uninstall device.

Step 4 – Now you have to perform the same steps for 3-4 times for all the USB devices present in your USB Serial Bus Controllers.

Step 5 – Finally, reboot your laptop and have a look at whether your issue has fixed or not.

Method 6 – Disable USB Selective Suspend

In case, you are still facing the USB Ports Not Working issue. You can now Disable USB Selective Suspend. It helps in preventing your device from the useless use of powers when not in need.

It does this all by changing some USB ports in the state of low – power. You can try to disable this feature in order to get rid of the issue.

Step 1 – Open the Search bar by following the above methods and then in that box, type choose a power plan. Then select the option Choose a power plan.

Step 2 – Now select the option Change plan settings which are present just after the plan option where you currently are.

Step 3 – Now select the option change advanced power settings.

Step 4 – Now you have to double click on both one after the other USB settings and USB selective suspects.

Note: In case you are performing all this on your laptop, you have to click on the battery and then disable it by using the menu Dropbox.

Step 5 – Now a drop-down list will appear on your screen. In order to expand it, you have to click on the Enabled option. Now Save all the changes that you made by clicking on Apply and OK.

Have a look if your problem is solved successfully.

Method 7 – Remove Your Laptop Battery

If the USB Ports not working problem is still stuck with your USB ports then you can try fixing this issue by removing the battery of your laptop. This solution has resulted in very effectively as reported by a lot of users.

To do so you just have to remove the battery of your laptop and press the power button for about 30-40 seconds. This process will help in discharging your capacitors.

A lot of users found it more effective to leave you switched off the laptop after removing the battery for a full night. It will surely help you to solve the USB Ports Not Working issue.


Read More:


Conclusion

The “USB Ports Not Working” error can be frustrating, but with a systematic approach to troubleshooting and the appropriate solutions, you can often resolve it and restore the functionality of your USB ports.

By following these solutions and maintaining proactive measures to keep your USB drivers and ports in optimal condition, you can efficiently troubleshoot and fix the “USB Ports Not Working” error, ensuring seamless connectivity for your USB devices and peripherals.

How To Fix ‘Printer Driver is Unavailable’ on Windows 10

Error
Error

The printer acts as hardware as well as a software device. It gives the feature to connect with PC either by wire or without wire but sometimes you have encountered the error of printer driver is unavailable on Windows 10.

When you connect the printer with PC you receive a notification by which you know that printer has been successfully linked with PC and ready to work. When the notification doesn’t appear even after linking PC and printer successfully then there might be some error due to which the notification doesn’t pop-up.

Error
Error

Understanding the Printer Driver is Unavailable Error

Before we delve into the details, let’s break down the error message itself:

  • “Printer Driver” refers to the software that enables your computer to communicate with and control your printer’s functionality.
  • “Unavailable” indicates that the driver necessary for your printer to function correctly is not accessible or has encountered an issue.

Read Also:

  1. 500 Internal Server Error
  2. IRQL_NOT_LESS_OR_EQUAL
  3. Origin Online Login Is Currently Unavailable

In simple terms, the “Printer Driver is Unavailable” error occurs when your Windows 10 computer is unable to locate or use the necessary printer driver to communicate with your printer.

Common Symptoms of the Error

When you encounter the “Printer Driver is Unavailable” error on Windows 10, you may experience the following symptoms:

  1. Error Message: The primary symptom is the appearance of an error message on your computer screen, indicating that the printer driver is unavailable.
  2. Inability to Print: You won’t be able to print any documents, and print jobs may be stuck in the print queue.
  3. Printer Not Recognized: Your printer may not be recognized by your computer, making it impossible to select as a printing option.

Now that we understand the symptoms, let’s explore the potential causes of the “Printer Driver is Unavailable” error.

Possible Causes of the Error

To effectively troubleshoot and resolve this error, it’s crucial to identify its underlying causes. Here are some common reasons behind the “Printer Driver is Unavailable” error on Windows 10:

  1. Outdated or Corrupted Drivers: Your printer drivers may be outdated, incompatible with Windows 10, or corrupted, causing the error.
  2. Windows Update Issues: Recent Windows updates may have disrupted the functionality of printer drivers, leading to the error.
  3. Print Spooler Service Problems: Issues with the Windows Print Spooler service, responsible for managing print jobs, can affect printer functionality.
  4. Driver Conflicts: Conflicts between multiple printer drivers or incompatible software can lead to driver unavailability.
  5. Connection Problems: Physical or network connectivity issues between your printer and computer can result in the error.
  6. Malware or Viruses: Malicious software or viruses can corrupt printer drivers or interfere with their operation.
  7. Printer Hardware Issues: Problems with your printer’s hardware components, such as cables or cartridges, can impact driver availability.

Now that we’ve identified the potential causes, let’s explore the solutions to fix the “Printer Driver is Unavailable” error:

Method 1: Unplug and Restart the Printer

Some silly mistakes can also cause the unavailable of the printer driver i.e. The wire which you use to connect the printer and computer maybe it is not properly connected is one of the silly mistakes.

You can fix the printer driver error by plug in the wire again after unplugging for 30 seconds and restart the printer is also a wise move to fix the error.

Method 2: Check all the Connection

The wire which you use to connect the printer and computer maybe it is not properly connected. Sometimes it might be the USB port issue in which the cable has been connected so make sure to change the USB port.

You must go for this method as it is a simple and basic method. I hope you can fix the printer driver. if not then don’t worry there are plenty of many methods too.

Method 3: Look for the Wireless Options

If your printer does support the wireless connection option then make sure to check the WIFI of the printer and switch it On in case it is Off for this you can check the instruction and read the manual which comes with the printer.

As it helps you to connect the printer with other devices for example Pc s, mobiles, and tablets. In case you are unable to On the Wi-Fi of the printer, to do so. Check out the manufacture website and follow all steps that have been given on the website to On the Wi-Fi option in your printer.

Method 4: Remove the Printer Driver

It is another simple method, you need to remove the printer driver to fix the error. Sometimes you have seen that printer driver is unavailable on the window in that situation just remove the printer driver, here are some steps to follow:

Step 1: Press the window button option menu appears to display then click on the control panel.

Step 2: Search devices and printer in the control panel, click on it.

Step 3: In the printer tab, click on the remote devices.

Step 4: Then remove the printer driver.

By following these few steps you can remove the Printer Driver, results to fix the error.

Method 5: Reinstall the Printer Driver

Reinstallation is the always better move to fix this error and soon you able to catch the pop on the PC when you connected the printer with PC.

There is a chance the printer device you install did not install due to some of the reasons i.e. missing files, you interrupt the installation process, corrupted files, and Viruses. here I am going to show you some of the steps to fix the error by just re-installing the printer driver.

So the first phase is the removal of the printer driver.

Step 1: Press the window button option menu appears to display then click on the control panel.

Step 2: Search devices and printer in the control panel, click on it.

Step 3: In the printer tab, click on the remote devices.

Step 4: And then remove the printer driver.

In the 2nd phrase, we reinstall the printer driver:

Step 1: Press the window button option menu appears to display then click on the control panel.

Step 2: Search devices and printer in the control panel, click on it.

Step 3: Then click add printer.

Step 4: Make sure to connect the printer and PC

Step 5: Follow the instruction while installing whereas don’t interrupt the installation process for successfully installing the printer driver

I hope this method works and you can fix the printer driver.

Method 6: Refresh with the Latest Printer Driver

Here are some of the latest printer brand which is available on the market and installing the printer driver in your PC before using it otherwise you are not able to get notified of the printer even after connecting the printer and PC.

H.P. Printer Canon Printer Epson Printer Brother Printer Samsung Printer

A. HP Printer Driver

HP stands for Hewlett-Packard, it is one of the prominent brands which start from the US and it provides some of cost-efficient and good quality product moreover you received the genuine printer driver disk from the company itself.

1. Canon Printer driver

The first thing in your mind when you heard canon is the camera so not only they build wonder-full and most moderate cameras they build the camera too. They provide high incentives for cash printers.it also provide various scanning option.

2. Epson printer driver

Epson not only manufactures printer but they also manufacture projectors, whereas the thing they manufacturer stand out from the other market irrespective either it is a printer or projector but according to most of the user they find the Epson printer more problematic issue in the windows than any other printer.

3. Brother Printer

Brother Printer provides one of the most prominent printers in India. They not only provide great quality but also their product possesses (printer) good quality compatible cartridge.

Believe me, if you will buy a printer of this brand you will never regret it as of it, as it provides great build in quality moreover they never compromised the quality of the print.

According to most of the users, they gave positive reviews of this brand and most of them never faced any issue while connecting the printer and computer.

4. Samsung Printer driver

Samsung is a tech brand which is famous for mobiles due to people s’ love they are manufacturing all the tech product some are Printer, mobiles, Ipad, laptop, desktop, headphone, and many other products.

Introduce your printer to your PC by installing the printer driver so that you can successfully connect the PC with the printer.

Method 7: Update window with all available

The regular update makes your window healthy irrespective of your windows version means you can avoid all the missing files, viruses by just updating your windows and sometimes the small error get fixed which included your printer driver issue here are some of the steps for all type of latest windows.

1. Windows 10

It is the latest window which is available in the market. here are some steps to update it

Step 1: Press window button in the search option type Check for update”.

Step 2: The updates option appears on your display.

Step 3: The updating of the window start by following the instruction and make sure to restart your pc just after updating the window.

2. Window 8

Here are some steps to update window 8

Step 1: Press window button in search option type” Check for update”

Step 2: The updates option appears on your display.

Step 3: The updating of the window start by following the instruction and don’t interrupt the updating process, you can also print the file for your satisfaction.

I hope you can update the windows and hope you fix your error.

Method 8: Utilize troubleshooter

Troubleshooter is one of the solutions to fix error whereas the printer driver error can also be solved by troubleshooter. To go further you need to connect your PC and printer.

Then open “aka.ms/diag_printer10” this link in your web browser and download the dialogue box. Run the troubleshooter and follow the given instruction that has been shown in your display don’t interrupt the process.

Method 9: Reset the Print Spooler

The printer spooler is responsible for all the processes while printing the file. Also, it is responsible for connecting the printer with PC one of the ways is to clear the spooler files followed by resetting. Here I am going to show you a couple of steps to fix the printer driver.

Step 1: Press “window”+ “r” button altogether dialogue box appear in the bottom left corner of the display

Step 2: Type “msc” in the run and press enter

Step 3: The menu appears in your display, find print spooler.

Step 4: Next, disable the service.

Step 5: In the search box; Enter; – %WINDIR%\system32\spool\printers and then delete all the files.

I hope you have done all the steps carefully.

Read Also:

  1. Chrome Won’t Open
  2. Kernel Security Check Failure
  3. ERR_QUIC_PROTOCOL_ERROR

Method 10: Change the status of Printer

If your printer possesses the advanced feature of connecting the printer via Wi-Fi. Then see whether your printer is switched On or Off. In case, it is Off then make sure to switch On.

Make sure to connect the printer and laptop on the same network then you can try to change the status of the printer by following the steps below:

Step 1: Press window button

Step 2: In the search box type “Printer and Scanners”.

Step 3: Select the printer of which you want to change the status and then click on the open queue.

Step 4: In the printer option click on the printer offline.

Step 5: Confirm the following steps so that the status of the printer will be set to be online.

We recommend you to remove all the devices and set up again.

This is all the possible and working method as shown above and I hope one of the methods able to fix the Printer driver. The result is, you can get notified when you connected the printer and PC.

Conclusion

The “Printer Driver is Unavailable” error on Windows 10 can be frustrating, but with a systematic approach to troubleshooting and the appropriate solutions, you can often resolve it and get back to hassle-free printing.

By following these solutions and maintaining a proactive approach to your printer’s drivers and hardware, you can efficiently troubleshoot and fix the “Printer Driver is Unavailable” error, ensuring your printer functions smoothly and reliably with your Windows 10 computer.

How To Fix ‘DNS_Probe_Finished_NXDomain’ Error in Chrome

DNS_Probe_Finished_NXDomain Error in Chrome

Google Chrome is a widely used web browser known for its speed and reliability. However, like any software, it can encounter errors that disrupt your browsing experience. One common error you might come across is “DNS_PROBE_FINISHED_NXDOMAIN.”

This error can be perplexing, preventing you from accessing websites. In this comprehensive guide, we will explore the meaning of the “DNS_PROBE_FINISHED_NXDOMAIN” error in Chrome, its significance, potential causes, and effective solutions to help you resolve this issue and continue browsing the web smoothly.

DNS_Probe_Finished_NXDomain Error in Chrome

Understanding the DNS_PROBE_FINISHED_NXDOMAIN Error

Before we dive into the details, let’s break down the error message itself:

  • “DNS_PROBE_FINISHED_NXDOMAIN” is an error message in Google Chrome that indicates a problem with the Domain Name System (DNS) resolution for a specific website.

Now, let’s explain each part:

  • “DNS” stands for Domain Name System, a crucial part of internet infrastructure responsible for translating human-readable domain names (e.g., www.example.com) into IP addresses (e.g., 192.168.1.1).
  • “PROBE” suggests that Chrome is actively trying to query the DNS for the website you’re attempting to visit.
  • “FINISHED” indicates that the DNS lookup process has concluded.
  • “NXDOMAIN” is a DNS response code that means the domain does not exist, or there is no DNS record associated with it.

In simpler terms, the “DNS_PROBE_FINISHED_NXDOMAIN” error occurs when Chrome cannot find the DNS information it needs to access a particular website, suggesting that the domain may not exist or is currently unreachable.

Read Also:

  1. Printer Driver is Unavailable
  2. YouTube Dark Mode
  3. Microsoft Compatibility Telemetry
  4. 0x80300024

Common Symptoms of the Error

When you encounter the “DNS_PROBE_FINISHED_NXDOMAIN” error in Google Chrome, you may experience the following symptoms:

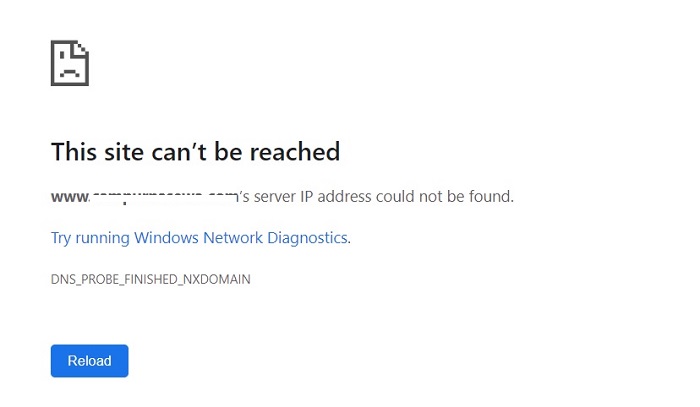
  1. Error Message: The primary symptom is the appearance of the error message in Chrome, typically displayed on a page with a message like “This site can’t be reached” or “Hmm, we can’t reach this page.”
  2. Inaccessible Websites: You won’t be able to access the specific website that triggered the error.
  3. Other Websites May Work: Other websites might still work fine, indicating that the error is specific to a particular domain.

Now that we understand the symptoms, let’s explore the potential causes of the “DNS_PROBE_FINISHED_NXDOMAIN” error.

Possible Causes of the Error

To effectively troubleshoot and resolve this error, it’s crucial to identify its underlying causes. Here are some common reasons behind the “DNS_PROBE_FINISHED_NXDOMAIN” error in Google Chrome:

  1. DNS Configuration Issues: Problems with your DNS settings, such as misconfigured DNS servers or incorrect network settings, can lead to DNS resolution failures.
  2. Incorrect URL: Typing an incorrect or misspelled URL in the address bar can result in this error.
  3. DNS Server Problems: Temporary issues with your DNS server or the DNS server of the website you’re trying to access can cause this error.
  4. Firewall or Security Software: Overly restrictive firewall or security software settings can block DNS requests and lead to DNS resolution failures.
  5. Router Issues: Problems with your router’s DNS settings, firmware, or connectivity can affect DNS resolution.
  6. Website Unavailability: The website you’re trying to access may be temporarily down or no longer exist, resulting in the error.

Now that we’ve identified the potential causes, let’s explore the solutions to fix the “DNS_PROBE_FINISHED_NXDOMAIN” error:

How to Fix DNS_Probe_Finished_NXDomain in Chrome

DNS_Probe_Finished_NXDomain error has been faced the most by the users using Windows 10, Windows 8.1, Windows 7, and even in Mac or Android Phones and with Browser and maybe sometimes in other internet browsers as well.

There are those few methods and steps that would help and guide some users through the solutions.

Method 1 – Change the TCP/IP4 Proxy Settings

Sometimes changing the network settings mostly of TCP/IP4 Proxy settings might help in solving the DNS_PROBE_FINISHED_NXDOMAIN error.

The following steps would help the user do follow the method correctly:

Step 1 – Firstly, the user has right-clicked on the windows and select the network connections option in it.

Step 2 – After that, the user has to right-click on the Active Network that the user is using at the time.

Step 3 – Then they have to find and select the Internet Protocol Version 4 (TCP/IPv4).

Step 4 – After that, a new window will open up where the user has to check and change the use and alternate the DNS addresses to preferred ones below, and then the user has to press Enter.

Preferred DNS Server: 8.8.8.8

Alternate DNS Server: 8.8.4.4

Step 5 – Finally, the user has to click OK and save all the changes.

Method 2 Reset the Winsock Program

Winsock is a program interface and one of the supporting programs as well. It is programmed to handle the input and output requests for Internet applications in the Windows systems of the user’s computer.

So, if this program does any misconfigurations, it can result in DNS_PROBE_FINISHED_NXDOMAIN error. Therefore, the user can solve their problem by Resetting the Winsock.

The resetting process of Winsock is straightforward, fast and efficient. Many users around the globe were able to solve their problem.

The following steps would help the users to follow the solution:

Step 1 – The user first has to open the Run dialog box [they can do so by pressing the Windows key and the R key together. After that the user has to type CMD, to find and select the Command Prompt.

Step 2 – Once the user finds it, they have to right-click on it and select Run as administrator option.

Step 3 – After that, the application would open, and then the user has to type down the following commands in the box, and then the user has to press Enter.

netsh Winsock reset

Step 4 – The user has to wait for the computer to process the command and then once the process is over, they then have to restart their computer and see if the problem is solved or not.

Method 3 Reset Chrome Flag Settings

This method is one of the most influential and proofed ways tried by many users online. There are steps that would help the user to conduct the method themselves:

Step 1 – The user has to type the following URL in the address bar:

Chrome://flags/

Step 2 – Then the user has to press Enter and let the Browser load the page.

Step 3 – After that, a setting page would open, and on the right side of the window, the user would find a reset and default option. They have to click that option.

Step 4 – The last step would reset their settings to default. The user can try to access the web, which is using the Chrome browser and check if the problem has been solved or not.

Method 4 Restarting the DNS Client

Sometimes the old tricks can work magic on some very tricky problems. The old trick of closing and restarting of the application can work as a solution for this DNS_Probe_Finished_NXDomain Error too.

The following steps would help the user to follow the method correctly:

Step 1 – The user first has to open the Run dialog box by pressing the Windows and the R key together. After that, the user has to type services.msc, and then the user has to click on OK

Step 2 – In front of the users, a new window would open, which would display the list of services. The user has to scroll down to find the service that has the name of DNS client.

Step 3 – Once the user finds that service, then they have to right-click on it and select the option of restart from all the other options from the pop-up list that appears after the right-click.

Step 4 – Once the user selects the restart option from the list. The DNS client service would restart itself. And after that happens, the user has to wait for a few minutes the user can surf the internet and then the user has to check if the solution had solved their problem or not.

Method 5 – Using Command Prompt

The DNS_PROBE_FINISHED_NO_INTERNET error can be solved by other commands as well. There have been many commands to renew flush or even release DNS settings. There are high chances that one command would not work to solve the error.

But that would not mean that another command would not work for solving the issue. The user can always try out different commands to solve their problem.

There are some other commands that would help the user to solve their problems. The following steps would enable the user to apply the command in their computer:

Step 1 – The user first has to open the Run dialog box by pressing the Windows key and the R key together. After that the user has to type CMD, to find and select the Command Prompt. Once the user sees it, they have to right-click on it and select Run as administrator option.

Step 2 – After that, the command prompt application will open.

Step 3 – After that, the user has to type the commands given below one by one, so each command is applied properly. And after each command, the user has to press enter to for applying each command correctly. The commands are as followed:

ipconfig /release

ipconfig /all

ipconfig /flushdns

ipconfig /renew

netsh int ip set DNS

netsh Winsock reset

Step 4 – After applying all the commands, the user has to restart their computer. And check if their problem of DNS_PROBE_FINISHED_NXDOMAIN error has been solved or not.


Read More:


Conclusion

The “DNS_PROBE_FINISHED_NXDOMAIN” error in Google Chrome can be frustrating, but with a systematic approach to troubleshooting and the appropriate solutions, you can often resolve it and continue browsing the web without interruptions.

By following these solutions and maintaining a proactive approach to your DNS settings and network configuration, you can efficiently troubleshoot and fix the “DNS_PROBE_FINISHED_NXDOMAIN” error, ensuring a smooth and hassle-free web browsing experience in Google Chrome.

How To Fix ‘Outlook Won’t Open’ on Windows 10 and Mac

Outlook Won't Open on Windows 10 and Mac

Microsoft Outlook is a widely used email and productivity application that plays a crucial role in many people’s work and personal lives.

However, encountering issues with Outlook can be frustrating, especially when you experience the “Outlook Won’t Open” error on both Windows 10 and Mac operating systems.

This error can disrupt your communication and workflow. In this comprehensive guide, we will explain the meaning of the “Outlook Won’t Open” error, its significance, what causes it on both Windows 10 and Mac, and effective solutions to help you resolve this issue and get back to using Outlook without interruptions.

Outlook Won't Open on Windows 10 and Mac

Understanding the Outlook Won’t Open Error

Before we dive into the details, let’s break down the error message itself:

  • “Outlook” refers to Microsoft Outlook, an email client and personal information manager.
  • “Won’t Open” indicates that the Outlook application is unresponsive and fails to launch when you attempt to open it.

In simple terms, the “Outlook Won’t Open” error occurs when Microsoft Outlook is unable to start or open, preventing you from accessing your emails, calendar, and other essential features.

Read Also:

  1. 0x80073712
  2. How To Enable Adobe Flash Player
  3. How to Change Brightness on Windows 10

Common Symptoms of the Error

When you encounter the “Outlook Won’t Open” error on both Windows 10 and Mac, you may experience the following symptoms:

  1. Error Message: The primary symptom is the appearance of an error message on your computer screen, indicating that Outlook cannot be opened.
  2. Unresponsive Application: Outlook becomes unresponsive and fails to launch, making it impossible to access your emails and other Outlook features.
  3. Inability to Send or Receive Emails: You won’t be able to send or receive emails, and your email workflow will be disrupted.

Now that we understand the symptoms, let’s explore the potential causes of the “Outlook Won’t Open” error on both Windows 10 and Mac.

Possible Causes of the Error

To effectively troubleshoot and resolve this error, it’s crucial to identify its underlying causes. Here are some common reasons behind the “Outlook Won’t Open” error on both Windows 10 and Mac:

For Windows 10:

  1. Corrupted Outlook Profile: A corrupted Outlook profile or data file can prevent the application from opening.
  2. Third-Party Add-Ins: Incompatible or malfunctioning third-party Outlook add-ins can cause the program to crash.
  3. Windows Updates: Recent Windows updates may have caused compatibility issues with Outlook.
  4. Antivirus or Firewall Interference: Overzealous antivirus or firewall software can block Outlook’s functionality.

For Mac:

  1. macOS Compatibility Issues: Older versions of Outlook may not be compatible with the latest macOS updates.
  2. Outdated Software: Running outdated versions of Outlook or macOS can lead to issues.
  3. Damaged Outlook Database: A corrupted Outlook database on Mac can result in the application not opening.
  4. Resource Overload: Running too many applications or processes simultaneously on a Mac may cause Outlook to become unresponsive.

Now that we’ve identified the potential causes, let’s explore the solutions to fix the “Outlook Won’t Open” error on both Windows 10 and Mac:

How to Fix Outlook Won’t Open on Windows 10 and Mac

If you encounter Outlook not opening error too, then don’t worry, I am going to show you all the possible and working methods to fix the Outlook won’t open.

Method 1 – Uninstall VPN Software

VPN stands for Very Personal Network. VPN gave you features to allow surfing and downloading the stuff from the internet privately.

Generally, people need security and privacy of networks, so they use VPN. If a VPN exists in your PC, then make sure to remove it or disable it because one of the reasons Outlook wouldn’t open is due to the continuous running of a VPN.

Method 2 – Use Microsoft Support and Recovery Assistant

Outlook won’t open error can be fixed by using Microsoft Support and Recovery Assistant tool. This tool is used to fix the common problem.

So running the Microsoft support, and recovery assistant is an easy and effective method to fix the error.

Method 3 – Start Outlook in Safe Mode and Disable Add-ins

Start Outlook in safe mode and disable add-ins is also a wise move to fix the Outlook won’t open error by following the steps given below:

Step 1 – Press Windows + R key altogether, the run appears in the bottom left side in the display.

Step 2 – In the dialogue box type Outlook/safe, press enter and then click OK button.

Step 3 – Choose the profile window open, click OK, and then enter the password after doing it click apply and then enter it.

Disable Add-ins

Make sure to disable add-ins before you start Outlook in safe mode.to do so follow the given steps:

Step 1 – In Outlook, go to File and then select an option in the option to choose Add-ins.

Step 2 – Then check in the add-ins (view and manage option), then check whether the Manage box shows COM Ads-ins or not.

Step 3 – Remember to disable all enabled Add-ins and disable the selected Add-ins, then make sure to click OK button.

Step 4 – Close Outlook.

Enable Add-ins

Now you have disabled add-ins make sure to restart the Outlook and enable the adds-ins to fix the issue:

Step 1 – Press the Windows + R key altogether, the run appears in the bottom left corner of the display.

Step 2 – In Outlook, go to File and then select an option in the option to choose Add-ins and enable it.

Step 3 – Restart the Outlook last time.

Step 4 – Enabled the add-ins again and restart the PC make sure to repeat this process until the error has been fixed.

It is a lengthy process, but it is useful, and according to most of the users, the Outlook would be fixed by this method.

Method 4 – Create A New Profile

One of the reasons, Outlook not opening error popup is due to the corrupted profile which gets corrupted due to the viruses and corrupt Windows. You can fix the Outlook error by just creating the new profile to do so here are some of the steps:

Step 1 – Press window button, the menu appears in the form of 2 columns, then click on the Control Panel.

Step 2 – In the control panel, click on the mail option.

Step 3 – In the mail option-click the profile option and changed the profile picture by just adding the image.

Step 4 – Fill the entries are given in the profile, i.e., name, profile picture, email address, and after filling all the entries correctly, click on the next button to move further.

Step 5 – Make sure to make all the options manual.

Step 6 – Click the Finish button, boom your profile have been ready to work.

Step 7 – Then go to the mail dialog. Select Prompt for a profile and then choose the OK button.

I hope the Outlook has fixed by the above method, and once the Outlook has been fixed, you can also retrieve the old profile.

Method 5 – Repair your Outlook Data File

All the Outlook data is stored in the data file. Sometimes data file can get corrupted to repair your Outlook data file, follow the given steps below:

Step 1 – Exit Outlook and go for the office installation folder.

Step 2 – Type SCANPST.EXE. Then press Enter.

Step 3 – Then, to go for Outlook data file by going to browse option.

Step 4 – Now, you can scan the file by starting the scan option. Whereas it led to repair the file.

Alternative

The alternate option is using Microsoft Exchange, as it has the feature of deleting your data file, to do so follow these steps.

Step 1 – Press window button menu appears in two-column, click on the control panel and select mail.

Step 2 – Select an Email Account in the Mail window.

Step 3 – Go to the data files tab, then choose the open file location.

Step 4 – A new window explorer window will open make sure to close all the other Windows, then all you need to locate the data file and delete it.

Make sure to open the Microsoft Outlook again. The alternate method is more efficient than the other method because this method is from Microsoft, who manufactures the Outlook.

Method 6 – Outlook Should Not Be Running in Compatibility Mode

Compatibility mode is used to run the software in Windows 10. When it failed to run in the display basically, it forces to run the software. Here are some steps to do so:

Step 1 – Find the folder destination of Outlook.exe.

Step 2 – Right-click on the Outlook .exe folder and sub click on the properties then choose compatibility mode.

Step 3 – Make sure to uncheck all the compatibility mode option and then click on the apply button.

Step 4 – Make sure to restart the Outlook to see the changes.

Method 7 – Make Changes in DPI Setting

According to most of the user, Outlook error has been fixed by just changing the DPI scaling into 100% to do so here are some steps:

Step 1 – Right-click anywhere on the desktop and choose the display settings.

Step 2 – Display setting opens change the DPI scaling into 100 % by just sliding with the help of your mouse.

Step 3 – Just restart your PC after doing both the steps to see the changes.

Just change the DPI to 100% by the above steps to fix the Outlook not opening issue.

Method 8 – Use the New Email Message Option

Make sure to shut down the Outlook completely. We recommended choosing the Task manager option to open the task manager option to make sure to follow the given steps:

Step 1 – Press Ctrl + Alt + Delete altogether on your keyboard.

Step 2 – Menu appears to click on the search bar and type task manager.

Step 3 – Click on the start task manager option.

Step 4 – Start the Task Manager process.

Step 5 – Right Click on the Microsoft Outlook and close the application.

There is an alternate method too. If the above steps don’t give you results then, you can use the new email option to implement this message. Here are some of the steps.

Step 1 – Locate the Outlook at the start in the menu and then right-click on it.

Step 2 – Select the new email message, or in some window, it displays as the new meeting option, both are the same thing.

Step 3 – A new window option appears, then right-click on the administrator option.

After following the above steps, the Outlook will open. If it doesn’t, then do follow another method as given below.

Method 9 – Use Different Password for Outlook

Here are some steps to follow to fix the Microsoft Outlook:

Step 1 – You need a Gmail account by which the Outlook has been connected.

Step 2 – Just generate the 16 digit app password and remember the password, you need to remember as it gives you access for Microsoft Outlook.

The issue gets solved if it is not; then, make sure to remove the Gmail account, which is connected to Microsoft Outlook.

There is the second alternative method too, which also provide more security to Outlook, and sometimes the error get fixed by given steps as shown below –

Step 1 – Right-click on the Outlook.

Step 2 – Menu appears to go to the File tab.

Step 3 – Then click on the account setting.

Step 4 – Generate the password for the Outlook.

Method 10 – Try Closing the Outlook With This Way

I know you surprised by this method and thinking what the rubbish is this how changing the way you close the Outlook, fix the Outlook error. According to the survey, it has been said that most of the user closed the Microsoft Outlook by just pressing the “Close” button.

Some of them used to close the Outlook by just pressing the power button, believe me, which is the worst option one of the reasons which cause the corruption of the window is pressing the power button directly.

The recommended option to close the Outlook is by choosing the File option in the Microsoft Outlook then click on the Exit button. This method reduced the chance of the error display in the Microsoft Outlook.

Method 11 – Send File Using Outlook

According to most of the users, sending the file with Outlook fix the Outlook error, so here, I am going to show you how to send the file via Outlook to fix the Outlook error.

Step 1 – Open Microsoft Outlook.

Step 2 – Create a message.

Step 3 – Then click on the Mime cast tab.

Step 4 – If you want to attach the file, then select the file you want to attach.

Step 5 – Last but not least, click on the send button.

Here is the alternative method of sending any file with Outlook.

Step 1 – Open the File Explorer.

Step 2 – Select the file you want to send.

Step 3 – Right-click on that file and click on the send to a mail recipient.

By following any of the methods you can send any file with Outlook.

Method 12 – Deleting the Outlook AppData Folder

Deleting the Outlook data folder led to fix the Outlook not opening error, sounds simple. Here I am going to show you some of the steps which led to the delete Outlook data folder and result in the Outlook data folder fixed.

This method required to shut down the Outlook data folder, so makes sure to delete the Outlook data folder.

Step 1 – Press Windows + R key altogether in your keyboard; the run appears in the bottom left side of the display.

Step 2 – Type %localappdata% in the dialogue box and press enter.

Step 3 – Search the Microsoft folder.

Step 4 – Then, locates the Outlook folder and make sure to delete it.

You can also try the alternate method is to delete the Outlook.xml file.

Step 1 – Press Windows + R key altogether in your keyboard; the run appears in the bottom left side of the display.

Step 2 – Type %localappdata% in the dialogue box and press enter.

Step 3 – Search the Microsoft folder.

Step 4 – Locate the Outlook.xml file and delete it.

You can also try any of the two methods; both can fix the Outlook won’t open issue.

Method 13 – Permissions to Access PST File

PST file holds all the information related to Microsoft Outlook. Whereas to access the PST file, you need permission; if you try some invalid method, then it might be possible you face an error that led to an Outlook would n’t open, but luckily, we got few steps to fix the Outlook not opening error.

Step 1 – Locate the PST folder.

Step 2 – Right-click on the PST folder.

Step 3 – Choose Properties on the menu.

Step 4 – Go to the security section and check whether the username is available or not. If the username is not displayed, then edit the username column.

Step 5 – You can add the user name by just clicking on the Add button.

Step 6 – Add the username by typing the genuine name.

Step 7 – Press the OK button.

Step 8 – Select the username from the group of the user names.

Step 9 – Click the Apply button and then an OK button to save changes.

It is recommended to restart the PC, and after restarting, I hope there will be no error.

Method 14 – Run SFC /Scannow Command Prompt

The work of the SFC /Scannow command is to scan all the system files and resolve the corrupt file by replacing the cached copy. You can solve the failed to play test tone issue by following the steps below:

Step 1 – Press the Windows + X button altogether on your keyboard. The main menu appears.

Step 2 – Press the Windows key in the keyboard in the bottom right search option appears type “cmd” in the search option and enter the keyboard.

Step 3 – Then right-click on the search “cmd” and click on the run as administrator. It will open an Elevated Command Prompt.

Step 4 – Elevated command prompt display in the screen then type SFC/Scannow press enter. As shown below

Step 5 – Scan in the “cmd” start wait for the scan to end, and it will automatically reboot your device once it has done.

More than 60% of users fix the Outlook won’t open error by using this method.

Method 15 – Reset the Navigation

This method works better on Windows 10; here are some steps to fix the Outlook.

Step 1 – It is mandatory to close the entire tab to get the best result.

Step 2 – Press Windows + R key altogether, Run box will appear in the display. Type Outlook.exe /resetnavpane in the dialogue box then press Enter.

The command will open, and the result is the deletion of all the customized related to the navigation and hope the Outlook has been fixed by this method. If not, then try a different method.

Method 16 – Delete the Registry Key

Deleting the registry key can be led to fix the Outlook not opening error. Some of us don’t follow all the steps thoroughly. In that case, you can backup your registration key. To delete the registry key follow the steps given below:

Step 1 – Press Windows + R key altogether in your keyboard the Run box appears in the bottom left side of the display.

Step 2 – Type Regedit in the dialogue box and press enter.

Step 3 – Search in the list, HKEY_CURRENT_USERSoftwareMicrosoftWindows NTCurrentVersionWindows Messaging Subsystem. Click on it to expand it.

Step 4 – Then choose the profile key, right-click in the profile key, and click on the delete option.

Step 5 – Make sure to restart your PC after doing all the 4 steps.

Method 17 – Log out of iCloud

iCloud is the cloud storage provider created by apple, whereas they provide the iCloud service in the entire apple platform. Here I will show you some of the steps which are its elf suggested by the Apple:

Step 1 – In Mac, go to the settings.

Step 2 – Scroll down to see the logout option.

Step 3 – As you find the logout option make sure to hit it.

Step 4 – Then, you get an option of your apple id and password, which is a mandatory option in the Apple device as they provide a high level of security.

Step 5 – Tap the logout option again.

By following these steps, you are successfully able to logout your iCloud in apple.


Read More:


Conclusion

Here I have suggested all the working, possible and practical methods that anyone could initiate it. I hope any of the given methods could able to fix the Outlook won’t open error. If not, then don’t worry, try another method as there is a vast number list of ways.

How To Fix ‘Digital TV Tuner Device Registration Application’ Issue

How to
How to

The Digital TV Tuner Device Registration Application Error is a common issue that can disrupt your TV viewing experience on your computer. This error often appears on Windows-based systems, particularly those with Windows Media Center.

In this comprehensive guide, we will explain the meaning of the Digital TV Tuner Device Registration Application Error, its significance, what causes it, and effective solutions to help you resolve this issue and enjoy uninterrupted digital TV tuning on your PC.

How to
How to

Understanding the Digital TV Tuner Device Registration Application Error

Before delving into the details, let’s break down the error message itself:

  • “Digital TV Tuner Device Registration Application” refers to a component of Windows Media Center responsible for registering and managing digital TV tuner devices.
  • “Error” indicates that there is an issue or problem related to this application’s functionality.

In simple terms, the “Digital TV Tuner Device Registration Application Error” occurs when there is a problem with the application responsible for managing your digital TV tuner devices, potentially leading to performance issues and system resource consumption.

Read Also:

  1. Printer Driver is Unavailable
  2. ERR_QUIC_PROTOCOL_ERROR
  3. Error Loading Player No Playable Sources Found

What Is A Device Registration Application For A Digital TV Tuner?

A digital TV tuner is a device that allows your digital TV to receive digital TV signals from local television channels. The Digital TV tuner device registration programme is a Windows Media Center task that runs on a regular basis.

It’s a simple feature on your PC that allows you to watch all of the cable TV channels from your local cable TV provider right on your computer.

The Digital TV Tuner Device Registration Application is usually installed alongside other software on your computer. ehPrivJob.exe, a non-system process, is the primary process of the Digital TV Tuner Device Registration.

It’s used to look into digital cable tuners that may be connected to your computer. The ‘eh’ abbreviation stands for eHome, and it refers to the application for registering digital TV tuner devices.

There are no difficulties with the Digital TV Tuner Device Registration Application or the mechanism behind it from a security standpoint.

However, while you are actively using the TV tuning feature, it significantly slows down your PC in terms of performance. However, it mostly affects boot-up times rather than overall system performance once the startup phase is completed.

Common Symptoms of the Error

When you encounter the “Digital TV Tuner Device Registration Application Error,” you may experience the following symptoms:

  1. High CPU Usage: One of the most noticeable symptoms is a significant increase in CPU usage, which can slow down your computer’s overall performance.
  2. System Freezes: Your computer may become unresponsive or freeze intermittently, especially when running resource-intensive tasks or during TV playback.
  3. Reduced System Performance: The error can cause a noticeable drop in your computer’s overall performance, making it challenging to perform tasks smoothly.
  4. Slow TV Tuning: Digital TV tuning may become slow and sluggish, leading to delays in channel switching and TV playback.

Now that we understand the symptoms, let’s explore the potential causes of the Digital TV Tuner Device Registration Application Error.

Causes of Issues with the Digital TV Tuner Device Registration Application

Because the majority of installed programmes will keep data on your system and registry, fragmentation may occur. As a result, invalid entries are created. As a result, your computer’s performance suffers.

ehPrivJob.exe, the process powering the Digital TV Tuner Device Registration Application, is a running application using machine code. The operation is also executed when you use Windows Media Center on your computer. As a result, it gets loaded into RAM and executed as a Windows Media Center process on your computer.

Although it isn’t CPU intensive, it can slow down your PC’s speed, especially if you run too many tasks at once. You can limit the amount of information overload by disabling processes that start up automatically.

5 Solutions To Issues With The Digital TV

Take a look.

1. Tuner Device Registration Application
Uninstalling the TV Tuner 

To cure your problem with this last technique, you must uninstall the TV tuner application. To do so, go through the steps below:

Step 1: To begin, go to your PC’s Control Panel and open it. You can do this by using the keyboard shortcut or by going to the Start button and searching for the Control Panel option.

Step 2: From the drop-down menu, choose Programs and Features from the drop-down menu.Select Uninstall a Program from the drop-down menu. Locate the television tuner and choose it. To uninstall the programme, click the Uninstall option.

2. End the Process with the Resource Manager

Ending the process that caused the issue in the first place is one technique to fix the Digital TV Tuner Device Registration Application error. The steps below will assist you in doing so:-

Step 1: Launch the Task Manager on your computer. To do so, either right-click on the taskbar and pick Open Task Manager from the menu, or hit the Ctrl + Alt + Del buttons on your keyboard simultaneously.

Step 2: Next, go to the Performance tab and open the Resource Monitor window from there.

Step 3: Go to the Processes tab and look for the ehPrivJob.exe process. Then press the Finish task button.

Step 4: To close the Task Manager window, click the OK button.

Step 5: Now all you have to do is restart your computer for the updated settings to take effect.

 3. Using the Control Panel

Step 1: Go to your computer’s Control Panel. You can do this by using the keyboard shortcut or by going to the Start button and searching for the Control Panel option.

Step 2: From the drop-down menu, choose Programs and Features from the drop-down menu.

Step 3: Now, disable the Turn Windows Feature toggle.

Step 4: Next, pick Media Features and click the expand icon to expand the options.

Step 5: Locate the Windows Media Center option and deselect it.

Step 6: Click the OK button to close the window and restart your computer to apply the updated settings.

4. Disable any Scheduled Tasks 

One of the key reasons of this problem is a task called ehdrminit. As a result, deactivating this scheduled job may aid in the resolution of the Digital TV Tuner Device Registration Application problem. To do so, simply follow these simple steps:

Step 1: First and foremost, you must access the Start menu. You can do this by using the keyboard shortcut or by going to the Start button and looking for the Task Scheduler option.

Step 2: Select the Library option from the drop-down menu.

Step 3: Go to the Microsoft Folder and open it.

L Now open the Windows folder and disable the ehdrminit task from there.

Step 5: Now, on your computer, close all open folders.

Step 6: Finally, restart your computer to apply the modifications.

5. Delete the DRM Folder

Digital Rights Management, or DRM, is a phrase that refers to any plan that uses technological means to control access to copyrighted information.

It relinquishes control of digital content usage from the individual who owns it and places it in the hands of a computer programme. To address your problem, attempt the procedures below to erase the DRM folder on your computer:

Step 1: First and foremost, open the File Explorer or My Computer application on your Windows computer.

Step 2: Next, go to the Programs menu and choose the Data folder.

Step 3: Select the Windows option from the Microsoft folder.

Step 4: Next, find the DRM folder and delete it.

P After that, restart your computer.

Read Also:

  1. Chrome Won’t Open
  2. Kernel Security Check Failure
  3. IRQL_NOT_LESS_OR_EQUAL

Conclusion

The Digital TV Tuner Device Registration Application Error can be frustrating, but with a systematic approach to troubleshooting and the appropriate solutions, you can often resolve it and enjoy seamless digital TV tuning on your computer.

By following these solutions and staying proactive in managing your TV tuner drivers and Windows Media Center settings, you can efficiently troubleshoot and fix the Digital TV Tuner Device Registration Application Error, ensuring a smoother TV viewing experience on your PC.

‘How To Enable Adobe Flash Player’ on Chrome, Firefox, Edge and Safari

How to Unblock Flash Player on Chrome, Firefox, Edge and Safari

How to Enable Adobe Flash Player: Adobe Flash Player is one of the popular computer software. Enormous people use it for many purposes.

It might be already installed in a few systems, and for those who do not possess Adobe Flash Player, they can enjoy the services through the plug-in extensions, which are widely available online.

Adobe Flash Player is compatible with many operating systems like Windows, Mac OS, and Linux, etc. Moreover, Adobe Flash Player can be downloaded for free in recent versions.

How to Unblock Flash Player on Chrome, Firefox, Edge and Safari

Users who use Firefox as their default browser are obliged to download the Adobe Flash Player software if they wish to watch the flash content available in the Adobe Flash Player.

However, if you are using Google Chrome, Safari, Microsoft Edge, and Internet Explorer you can enable the Adobe Flash Player from your own settings menu.

Read Also:

  1. Outlook Won’t Open
  2. How to Fix USB Ports Not Working
  3. DNS_Probe_Finished_NXDomain

How to Enable Adobe Flash Player On Google Chrome

Step 1: Launch Google Chrome from your system by double-clicking on the chrome icon found either in your Taskbar, Desktop, or Start Menu.

Step 2: Click on the Customize and control button. It is the three horizontal dots available at the top right corner of the screen.

Step 3: As soon as you click on the button, a drop-down menu will appear. From the obtained list, click on settings and open it. You can also access settings by inputting “chrome://settings” in the browser URL box to open settings.

Step 4: Scroll down and locate the Advanced option, tap on it to open.

Step 5: Further, slide down and click on the Content Settings found adjacent to privacy and security options.

Step 6: At the center pane of the page, you can see an option called Flash, tap on it.

Step 7: There is a toggle button next to Block Sites from running flash. Enable it by sliding which turns Blue if enabled. This function interprets to the system that you can retrieve flash content on ask first basis. In case you find it to be blue already, then it means the Flash player has been enabled.

Step 8: If required, unblock a particular site on your own. There are chances you might have blocked few sites to access Flash content, you can enable it again by visiting your block list and choose the site on which you want to use the flash and click on the three horizontal dots icon found adjacent to it and tap on the remove option from the drop-down menu listed.

Step 9: Chrome isn’t authorized to load and display the Flash content automatically, so you will have to enable flash links on the Flash window and if prompted click the Allow button in order to watch the flash content uninterrupted.

Likewise, clicking on the Adobe Flash Player link will function the exact same way as Enabling the Flash icon.

How to Enable Adobe Flash Player On Firefox

Step 1: Double click on the Firefox icon found either on the desktop or the Start menu to launch the Mozilla Firefox browser.

Step 2: Visit the Adobe Flash Player official site by clicking on the link below: https://get.adobe.com/flashplayer/

Copy the link and paste it in Firefox search bar and press Enter.

Step 3: We advise you to carefully uncheck the options to make sure Adobe Flash Player does not install unwanted programs on your system along with the required one.

Step 4: In the webpage you will find a yellow button on the lower side which reads Install now, click on it to install the software.

Step 5: If prompted, click on Save File to download the file on your system.

Step 6: Exit the Firefox browser after completing the process. We advise you not to skip this step at any chance because doing so will restrict you from installing Flash player plug-in to Firefox if the browser remains open. This in turn doesn’t allow the browser to load flash and display the Flash Content although the Flash Player is already installed.

Step 7: Now move to your download folder in your system and locate the Adobe Flash Player file. Double click on it to install the software. Proceed by following the wizard until you reach the Finish. Once you see the Finish button on the screen window click on it to install the Flash player in your system.

Step 8: Once the installation is successful, exit the browser window that you have opened earlier. Continuing which, re-launch the Firefox browser.

Step 9: Click on the three horizontal lines found at the top right corner of the browser. Now, a drop-down menu will appear for you.

Step 10: From the drop-down menu, choose Add-ons option and click on it to open the list of add-ons available in your Firefox.

Step 11: On the left panel of the page, you will find a plugins tab tap on it.

Step 12: Then click on the “Ask to Activate” drop-down menu from the adjacent “Shockwave Flash” heading. Now tap on “Always Activate” in the corresponding drop-down menu. You can ignore this step if you wish for the Firefox to request you for permission before playing Flash content.

Step 13: As the final step, since you have enabled the automatic use for flash player, browsing a page that includes flash content will allow the user to view the content automatically. Considering another scenario, if your browser’s Flash player is set to “Ask to Activate” then, you will have to tap on the flash content. Next, choose Allow from the prompted pop-up window.

How to Enable Adobe Flash Player On Microsoft Edge

Step 1: Start your Edge Browser by either clicking on its icon at the desktop or by locating the browser in the start menu and open it.

Step 2: Open Settings by either pressing Alt key + X on your keyboard or click on the button with three horizontal dots at the top right corner of the Edge browser’s window. Now choose Settings from the drop-down menu displayed and tap on it.

Step 3: Now scroll further down to locate View Advanced settings and tap on it.

Step 4: Activate the Use Adobe Flash Player by sliding the toggle switch found next to it. You will know the player is enabled in Microsoft edge as the switch turns blue when activated.

In case the switch is already turned blue then it means the Adobe Flash Player has been enabled. There is no need for the user to press the Allow button displayed in the pop-up box every time because Microsoft Edge will load and display the Flash content automatically.

How to Enable Adobe Flash Player On Internet Explorer

Step 1: Launch Internet Explorer browser on your system by either clicking on its icon found on the desktop or in the Start menu.

Step 2: Open Tools by either pressing Alt + x on your keyboard or press on the Gear shaped icon found at the top right corner of the browser.

Step 3: A dropdown menu will appear as soon as you click on the Tools. From the list of options select Manage add-ons and click on it to open.

Step 4: Under Manage Add-ons, on the left panel of the window there are few Add-on Types. Tap on Toolbars and Extensions tab from the given list.

Step 5: On the left panel there is a drop-down menu under Show. Click on the All add-ons option from the menu.

Step 6: Now in the Center pane, locate the option Shockwave Flash object and click on it.

Step 7: Enable this particular object by clicking on the enable button found at the bottom right corner of the window. Doing so will activate the Flash player. If you find the disable button then it means that you have already enabled the Flash player in your Internet Explorer. You don’t have to explicitly enable it again.

Step 8: Again click on the Close button found at the bottom right corner of the window to apply to exit the window and apply the changes. You should be able to view the Flash content from here onwards. Even in Internet Explorer, the user doesn’t have to click on the allow button every time to view the Flash content. Internet Explorer will load the content and display it to the user automatically.

How to Enable Adobe Flash Player On Safari

Safari browser is used in systems that run on the Mac Operating system.

Step 1: Click on the Safari icon to launch.

Step 2: At the top left corner of the screen locate the Safari button and tap on it. Now a drop-down menu will appear for you.

Step 3: Choose the Preferences option from the drop-down menu and click on it to open it in a new window.

Step 4: Under the Preferences window click on the websites tab. You will find it at the top of the browser.

Step 5: Further, below the “Plug-ins” section, choose the Adobe Flash Player tab and tap on it. You will get it at the lower side of the window.

Step 6: Tap on the “When visiting other websites” drop-down box found at the bottom right corner of the window. Doing so will display a drop-down menu.

Step 7: From the list of options in the drop-down menu, choose On and click on it. On option will enable the Flash player in your Safari browser so that you can view the Flash content from the Adobe Flash Player. Even in the safari browser the flash content is automatically loaded and displayed for the user. So that you do not have to click on the allow button every time it plays.

Step 8: Adobe Flash Player might not be enabled for all the open websites. In the main window if you find any websites with the text off, then click the off option from the drop-down menu and tap on the On button in the resulting menu.


Also Read:


Conclusion

With the thought that you have diligently gone through the article to use the Adobe Flash Player in your system. So by the end of the article, we hope you found what you were looking for. As we have carefully analyzed Adobe Flash Player plug-in and its working in various browsers.

Hence, we have come up with a solution for each browser. So that the users can enjoy the Adobe Flash Player privileges.

How To Fix ‘ERR_EMPTY_RESPONSE’ or No Data Received Error in Chrome

Error
Error

Google Chrome stands as one of the most widely used web browsers, valued for its speed, efficiency, and user-friendly interface. However, like any software, Chrome can occasionally encounter errors that hinder your browsing experience.

The “ERR_EMPTY_RESPONSE” or “No Data Received” error is one such issue that Chrome users may encounter. This error can disrupt your web browsing by preventing you from accessing websites.

In this detailed guide, we will explore the meaning of the “ERR_EMPTY_RESPONSE” or “No Data Received” error, its significance, potential causes, and effective solutions to help you resolve this frustrating issue and get back to seamless web browsing.

Error
Error

Understanding the ERR_EMPTY_RESPONSE or No Data Received Error

Before delving into the specifics, let’s break down the error itself:

  • “ERR_EMPTY_RESPONSE” or “No Data Received” refers to the error messages displayed by Google Chrome when it fails to receive any data or response from a website’s server.

In simple terms, the “ERR_EMPTY_RESPONSE” or “No Data Received” error occurs when Chrome tries to retrieve data from a website, but the server does not provide any information in response, resulting in an empty or blank page.

Read Also:

  1. Printer Driver is Unavailable
  2. ERR_QUIC_PROTOCOL_ERROR
  3. Error Loading Player No Playable Sources Found

Common Symptoms of the Error

When you encounter the “ERR_EMPTY_RESPONSE” or “No Data Received” error in Google Chrome, you may experience the following symptoms:

  1. Blank Page: The primary symptom is that the web page you are trying to access remains completely blank or empty.
  2. Error Message: You may see an error message in the address bar, such as “ERR_EMPTY_RESPONSE” or “No Data Received.”
  3. Unresponsive Tabs: The affected tab may become unresponsive, and you won’t be able to interact with the web page.
  4. Inability to Load Websites: You will be unable to load the specific website displaying the error, affecting your browsing experience.

Now that we understand the symptoms, let’s explore the potential causes of the “ERR_EMPTY_RESPONSE” or “No Data Received” error.

Possible Causes of the Error

To effectively troubleshoot and resolve this error, it’s crucial to identify its underlying causes. Here are some common reasons behind the “ERR_EMPTY_RESPONSE” or “No Data Received” error in Google Chrome:

  1. Network Issues: Problems with your internet connection, such as intermittent connectivity or a weak signal, can result in this error.
  2. Server Problems: The website’s server may be experiencing issues, including high traffic, downtime, or misconfigured settings, preventing it from delivering data.
  3. Firewall or Security Software: Overzealous firewall settings or security software on your computer can block incoming data, leading to the error.
  4. Browser Cache and Cookies: Corrupted or outdated browser cache and cookies can interfere with the loading of web pages.
  5. Extensions and Add-ons: Certain Chrome extensions or add-ons may conflict with website data retrieval, causing the error.
  6. Proxy Settings: Incorrect proxy server settings in Chrome can disrupt data communication with websites.
  7. DNS Cache: Cached DNS records on your computer may become outdated, leading to difficulties in resolving domain names to IP addresses.

Now that we’ve identified the potential causes, let’s explore the solutions to fix the “ERR_EMPTY_RESPONSE” or “No Data Received” error:

Chrome Error ERR_EMPTY_RESPONSE Fix for Windows 10/8/7

If it doesn’t work for you, follow the steps in the instructions below to solve the ERR_EMPTY_RESPONSE problem. The strategies listed below can assist you in resolving the No Data Received error:

 1. Turn Off Anti-virus

Antivirus software can sometimes prevent some websites from loading. There’s a good likelihood you’re having this issue as a result of it.

Disable your antivirus software, firewall, and disconnect from your VPN to see if this helps. Restart your PC and try opening the webpage on which the No Data Received error came up and see if it is still there.

Don’t panic if you get the No Data Received issue on your own website; there is something you can do about it.

2. Reset Winsock 

Errors like No Data Received are known to be caused by Winsock corruption. If Winsock corruption is the cause of the No Data Received issue, it can be readily fixed by resetting the Winsock.

To reset the Winsock, follow the instructions below:

Step 1: On the keyboard, press the Windows Keys.

Step 2: In the search box, type cmd.

Step 3: Right-click CMD and select Run As Administrator from the context menu.

(If you have Windows 8 or Windows 10 )

Step 1: Press X while holding down the Windows key.

Step 2: Select Command Prompt from the drop-down menu (Admin)

Step 3: The steps after that are the same for all of the windows.

Step 4: In the black command prompt box, type netsh winsock reset and hit Enter.

Step 5: Restart your computer after completing the preceding steps to determine if the error has been resolved.

If the No Data Received problem persists, move on to the next method.

3. Reset the Network Stack 

Step 1: Press the Windows key + x to bring up the Start menu.

Step 2: When the menu appears, select Command Prompt (Admin) from the drop-down menu.

Step 3: A terminal window will appear on the screen. Press the enter key after entering the command listed below.

netsh winsock reset ipconfig/ flushdns ipconfig/ registerdns ipconfig/ release ipconfig/ renew
catalogue
netsh int ipv 4 reset netsh int ipv 4 reset netsh int ipv 4 reset
log into netsh and type ipv6 reset reset.
log\spause\sshutdown/r

After you’ve completed the instructions above, restart your computer as usual. After rebooting, go to the website where you received the No Data Received message and see if the problem has been resolved.

If the issue still persist follow the following approach.

4. Hosting Provider 

If you receive the No Data Received issue on your own website, you should contact your hosting provider so that they can restore your site from a backup. You should inform them of your recent adjustments.

Read Also:

  1. Chrome Won’t Open
  2. Kernel Security Check Failure
  3. IRQL_NOT_LESS_OR_EQUAL

Finishing

The “ERR_EMPTY_RESPONSE” or “No Data Received” error in Google Chrome can be a frustrating obstacle, but with a systematic approach to troubleshooting and the appropriate solutions, you can often resolve it and continue your web browsing uninterrupted.

By following these solutions and staying proactive in maintaining your browser’s performance and settings, you can efficiently troubleshoot and fix the “ERR_EMPTY_RESPONSE” or “No Data Received” error, ensuring a smooth and hassle-free web browsing experience in Google Chrome.

How To Change Brightness on Windows 10

How to Change Brightness on Windows 10

Windows 10, Microsoft’s widely used operating system, offers a range of customization options to enhance your user experience. One such option is the ability to adjust the brightness of your display.

Whether you’re working in a bright room or watching a movie in a dark setting, knowing how to change brightness on Windows 10 can be invaluable.

In this comprehensive guide, we will explore the various methods to adjust screen brightness on Windows 10, the significance of this feature, and tips for optimizing your display settings.

How to Change Brightness on Windows 10

The Significance of Adjusting Screen Brightness

Before we dive into the details of changing screen brightness on Windows 10, it’s important to understand why this feature is significant:

  1. Visual Comfort: Proper brightness adjustment ensures that your screen is comfortable to view, reducing eye strain and fatigue during extended use.
  2. Energy Efficiency: Lowering screen brightness can extend your laptop’s battery life, making it especially useful for portable devices.
  3. Adaptability: Adjusting brightness allows you to adapt your display to different environments, whether you’re working in a brightly lit office or a dimly lit bedroom.
  4. Enhanced Viewing Experience: When watching videos or viewing images, optimal brightness levels can enhance color accuracy and overall visual quality.

Now that we appreciate the significance, let’s explore the methods to change brightness on Windows 10:

Read Also:

  1. Outlook Won’t Open
  2. DNS_Probe_Finished_NXDomain
  3. How to Fix USB Ports Not Working

How to Change Brightness on Windows 10

Method 1 – Manually Change Brightness in Windows 10

Step 1 – Start Settings by holding Windows key + I.

Step 2 – Now navigate to Settings > System > Display. There is a slider under the Brightness and colour section named Change brightness, slide it to adjust the brightness.

In case you cannot find a slider in that section it’s either because you are currently using an external monitor, so you have to use the buttons on it to adjust the screen brightness, or your display driver is outdated, so kindly update it.

Step 3 – To update your display driver, press Windows key + X, and select Device Manager from it.

Step 4 – Elaborate the Display adapters and right-click on your graphics card. Then click on Update driver and keep going until you reach the finish.

Method 2 – Using the Windows Mobility Center

There is another utility available in Windows 10 for users to change the screen brightness, i.e. Windows Mobility Center.

Hold Windows key + X and click on the Mobility Center from the listed options. Finally, you can use the Display Brightness Slider here to adjust the brightness.

Method 3 – Using Adaptive Brightness in Windows 10

In ideal systems, your screen brightness changes automatically depending upon the light around your surroundings. But to avail of this feature, your system needs to have a brightness sensor. Follow the steps given below to enjoy this feature.

Step 1 – Press Windows key + I to open settings. Now go to settings, and click on Display. There will be a button named Change brightness automatically when lighting changes, turn it on. If you cannot find such a button, then, unfortunately, your system does not have the brightness sensor.

Step 2 – The same can also be achieved through the Control panel. So, press Windows key + R and input “control panel” then press OK.

Step 3 – As soon as the control panel window is open, click on Hardware and sound option. Again, click on the Power Options button and choose Change plan settings. This time, click on Change advanced power settings.

Step 4 – under the power options tab, you will find a list of settings. Expand Display > Enable adaptive brightness and use the dropdowns to set it for both On battery and Plugged in plans.

Method 4 – Change Brightness Using the Keyboard

Some of your keyboards contain shortcuts to modify your brightness suitable for your choice so you can access them easily. Although quite a lot of laptops have this feature. Listed below are the keys which can be used to adjust the brightness.

You can identify the keys easily as they have a sun icon printed upon them. The precise key combination differs for every keyboard model. You should press the [Fn] key along with the corresponding function key.

For instance, on Huawei Matebook laptop, you need to press Fn key disabled and press F1 to lower brightness and F2 key to increase brightness significantly. (Fn key needs to be disabled or else Fn key would activate F1/F2).

Method 5 – Change Brightness on Windows 10 Using Shortcuts

Follow this method for two efficient and simple shortcuts used for adjusting the brightness settings.

Step 1 – You can change the brightness using an Action centre icon usually found on the taskbar or press Windows key + A on the keyboard. Move the brightness slider to the level you desire.

In case you cannot find the icon anywhere on the taskbar, hold Windows key + I, move to System > Notifications & actions > Edit your quick actions. Furthermore, click on Add > Brightness > Done.

Step 2 – Few users are not satisfied with the system services, so they rely on third-party utilities. Here we have named one such utility, refer to this Github project and download the file.

Step 3 – Click on the file to open it; this will include a brightness icon to your system tray automatically. For those users who want to access it regularly can place it in a default position—Right-click on the icon and select Run At Startup.

Method 6 – Automatically Adjust Brightness for Battery Life

Working with high brightness usually results in a system draining battery life. Fortunately, Windows 10 comes with a battery saver tool that automatically reduces your screen brightness if it is enabled.

Step 1- As mentioned above, open settings by holding Windows key + I on your keyboard and tap on System > Battery and scroll further down until you reach Battery saver settings.

Step 2 – Enable the checkbox found next to Turn battery saver on automatically if my battery falls below and then adjust the slider to the battery percentage level where you want this feature to activate automatically.

Step 3 – Further, check the Lower screen brightness while in battery saver checkbox. Remember this feature will not allow you to set the brightness.

Method 7 – Automatically Change Brightness for Power Plan

Your Laptop might have different brightness depending on the factors, whether it is charging or working on battery life. For instance, while working with laptops to make sure the PC doesn’t consume more battery set it to a lighter brightness when it’s not plugged in.

Step 1 – Launch control panel which is either found on your taskbar or hold Windows key + R to start run the utility and input the text “control panel” in the Run dialog box. Finish it by pressing OK.

Step 2 – Now, go to Hardware and sound section > click on the Power options button. Then under select a power plan, you can see two options. Choose your plan and select the Change plan settings button found next to it.

Step 3 – As you can see individual slider named Adjust plan brightness under both On battery and Plugged in. Move the slider to adjust the battery and click on the save changes button to apply the changes button.

Method 8: Using Windows Settings

Windows 10 offers a user-friendly method to adjust screen brightness through the settings menu:

  1. Click on the “Start” button (Windows icon) in the lower-left corner of your screen.
  2. Go to “Settings” (the gear-shaped icon).
  3. In the Settings window, select “System.”
  4. From the left sidebar, choose “Display.”
  5. Under the “Brightness and color” section, you’ll find a slider labeled “Change brightness.” Slide it to the left to decrease brightness or to the right to increase it.
  6. As you adjust the slider, your screen brightness will change accordingly. Release the slider when you achieve the desired brightness level.

Method 9: Adjusting Brightness on External Monitors

If you’re using an external monitor with your Windows 10 device, you may need to adjust its brightness separately. Most external monitors have physical buttons or an on-screen menu for this purpose. Consult your monitor’s user manual for specific instructions.

Additional Tips for Optimizing Display Settings

In addition to adjusting brightness, consider these tips to optimize your display settings on Windows 10:

  1. Night Light: Windows 10 offers a Night Light feature that reduces blue light emissions, making the display warmer and easier on the eyes, especially during evening hours. You can schedule Night Light or turn it on manually from the Display settings.
  2. Color Calibration: For precise color accuracy, use the built-in Color Calibration tool to calibrate your display. It ensures that colors are displayed as intended.
  3. Power Plan Settings: Customize your power plan settings to control screen brightness when your device is running on battery or plugged in. This can help extend battery life.
  4. Multiple Displays: If you’re using multiple displays, you can adjust the brightness of each one individually to ensure consistent visuals across all screens.
  5. Graphics Driver Updates: Ensure that your graphics drivers are up to date. Manufacturers often release driver updates that can improve display performance and compatibility.

Don’t Miss: How to Activate Showtime Anytime

Read Also:

  1. Showtime Anytime
  2. Outlook Not Responding
  3. Skyrim Failed to Initialize Renderer

Conclusion

Guiding yourself about reducing and increasing the screen brightness appropriately can help in countless ways whether it is about protecting your eyes from being strained or saving your battery life.

We hope you found this article to be helpful in discovering various methods that can be used to adjust your screen brightness based on your choice.

How To Fix A ‘500 Internal Server Error’ on Your WordPress Site

Error
Error

As we have evolved into a contemporary society, technology has become a vital part of our daily lives. Laptops and computers have become indispensable in our lives since they enable us to perform a wide range of tasks and improve our job on a daily basis.

These devices occasionally have flaws and difficulties that can obstruct our job. On a WordPress site, one such problem is the 500 Internal Server Error. We’ll look at it in depth in this essay.

Error
Error

What is a 500 Internal Server Error?

The 500 Internal Server error is a non-specific error that indicates that there is a server error but does not specify what it is.

It can be caused by a variety of factors. This problem necessitates extensive troubleshooting, which takes time and patience on the part of the user. Let us investigate the causes.

Read Also:

  1. Printer Driver is Unavailable
  2. ERR_QUIC_PROTOCOL_ERROR
  3. Error Loading Player No Playable Sources Found

The Sources of This Error

The source of this mistake is due to a number of things –

  • Login credentials to the database are incorrect.
  • The database has been corrupted.
  • In your WordPress installation, there are corrupted files.
  • There are problems with your database server.
  • WordPress core files have been corrupted.
  • PHP memory limit and a corrupted.htaccess file.
  • Third-party plugins and themes are causing problems.
  • PHP timeouts or catastrophic errors Third-party plugins cause PHP problems.
  • Permissions for files and folders are incorrect.
  • Your server’s PHP memory limithas been reached.
  • .htaccess file is corrupted or broken.

In online browsers like Safari and Mozilla Firefox, your screen may go white blank, signalling a 500 internal server error. Also, larger brands, such as YouTube and Readme, have their own unique ways of expressing this problem.

What to Do If You Get a 500 Internal Server Error

The 500 internal server problem is fairly common, but it takes a long time and a lot of patience to fix. The solutions listed below can assist you in resolving a 500 Internal Server Error on your WordPress site and are safe to use.

These approaches do not require any technical knowledge; all that is required is a basic understanding of the device, after which you may follow the instructions and resolve the issue. This error might also come from both the user and the server.

Always remember to create a backup before beginning with the solutions in such situations. We’ll start by making a backup and then proceed.

It’s time to buy a backup plugin if you don’t already have one or even know what one is. If your web server offers backups, that’s great, but it’s better to have your own solution so that you don’t have to go via the host in an emergency.

BackUpWordPress, VaultPress, and BackupBuddy are some of the backup tools available. Also, if you want to go with database backups, SQL server database is a good option.

1. Reloading the Page 

Reloading the page is the first option on the list. It is the most basic and initial step to do before trying any other way to resolve the problem.

Simply reload the page and wait for it to load again. You could, on the other hand, try a different web browser. Also, if you have any doubts regarding whether or not the site is down. You can simply use certain tools to assist you in your checking.

Toollike Down is primarily recommended for everyone or just myself. This website will verify and notify you if the site is operating, as the name implies. This problem has also been observed when the user uploads themes or works on WordPress. It can take some time for everything to calm down. Simply re-energize.

 2. Delete the Cache in Your Browser

Clearing your browser cache is the next option on the list. It is recommended that you clean your browser cache to resolve the 500 Internal Server Error on your WordPress site. The methods below will show you how to clear it in various browsers.

How to Force a Single Page to Refresh.

This is all you have to do –

Step 1: Download and install the browsers for Windows and Linux. F5 + CTRL

Step 2: Use the SHIFT + Reload toolbar button on Apple Safari.

Step 3: Google Chrome and Mozilla Firefox for Mac: SHIFT + CMD + R

How to Clear Google Chrome’s Browser Cache

Clearing the cache in Google Chrome can be done in the following steps:

Step 1: Launch Google Chrome and navigate to the three dots symbol.

Step 2: Select Clearing Browser Data from the More tools menu.

Step 3: You’ll see a window pop up. Ascertain that you are only clearing cached data; otherwise, you may lose all of your passwords, cookies, browser history, and other information.

Step 4: Finally, click Clear Browsing Data to complete the process.

How to Clear Mozilla Firefox’s Browser Cache

To delete your browser cache, simply follow the steps below –

Step 1: To begin, launch Mozilla Firefox. Navigate to the hamburger menu and select it.

Step 2: Select Clear Recent History from the History menu.

Step 3: Clear All History will appear in a new window. To continue with the process, you must change the Time range to Everything.

Step 4: Then, in the details, click on Cache.

Step 5: Finally, select Clear Now.

How to Delete the Opera Browser Cache

The steps below will assist you in doing so:

Step 1: Locate and click the Opera icon.

Step 2: Select Clear Browsing Data from the More Tools menu.

Step 3: Select and obliterate the following objects as needed. Now be cautious while clicking on photos and files that have been cached.

Step 4: Finally, select Clear Browsing Data.

How to Delete the Microsoft Edge Browser Cache

Stick to the instructions. –

Steo 1: Click on the three dots symbol in the right pane.

Step 2: Select Settings from the drop-down menu. Choose what to clear from the options menu.

Step 3: Make sure you click on Cached data and files with care. After that, select

How to Delete the Internet Explorer Cache

Follow these methods to clear the cache in Internet Explorer:

Step 1: Navigate to the gear icon and select it.

Step 2: Go to Safety and select Delete browsing history from the drop-down menu.

Step 3: Select Temporary Internet files and website files from the Delete Browsing History menu, then click Delete.

3. Examine the Server Logs

Checking your server logs is the next option on the list. A server log is a file that records all of the server’s actions. In WordPress, you can simply enable Debugging mode. It may not fix the problem, but it will provide you with additional clarity. Add the following code to the wp-config.php file to enable it:

define(‘WP DEBUG’, true); define(‘WP DEBUG’, true); define(‘WP DE

define(‘WP DEBUG LOG’, true); define(‘WP DEBUG LOG’, true); define(‘WP DE

Additionally, if you utilise Kinsta, you may use the log viewer to learn more about the problems.

Analytical tools can be used by users to determine the frequency with which the 500 internal server error occurs.

4. Error Establishing a Database Connection 

Error Establishing Database Connection is the fourth method on the list. The database connection error is a typical issue that occurs when WordPress is unable to connect to the database. The page becomes blank, with the phrase “problem establishing a database connection” appearing.

Several reasons are now to blame for this issue, which are described below:

1. Incorrect login credentials: WordPress, as we all know, requires a unique login and password to continue. It’s possible that it was modified for some reason and is now causing an issue.

2. Corrupted Files: This issue can be caused by a variety of factors, including corrupted files. Due to botched theme and WordPress software updates, files become corrupted.

3. Database server: Due to significant traffic spikes, the database server may go down, resulting in the Error Establishing a Database Connection.

4. Corrupted database: Databases can become corrupted for a variety of reasons, including active themes and plugins, missing data or tables, and so on.

5. Check Your Plugins and Themes 

Checking your plugins and themes is the next method on the list. Plugins are pieces of software that extend the functionality of a WordPress site.

This problem occurs after installation or during the installation of an update. As a result, all plugins and themes should be disabled. Simply follow these procedures to deactivate plugins:

Step 1: Go to WordPress and select Plugins from the left-hand menu.

Step 2: Select the bulk activities you want to deactivate, then click Deactivate.

Step 3: Once that’s done, start activating them one by one to figure out who the real bad guy is. After each activation, reload the site.

Step 4: If you get an error notice, it signifies you’ve discovered the source of the problem.

Keep your themes, plugins, and WordPress up to date at all times.

6. Reinstall WordPress Core 

WordPress core can become corrupted, resulting in a 500 Internal Server Error on the WordPress site. You may reinstall WordPress core in a variety of methods. Also, keep in mind that you should always have a backup in case of a problem.

The following methods can be used to reinstall WordPress:

Step 1: Using FTP (File Transfer Protocol), reinstall WordPress.

Step 2: Using WP-CLI, reinstall WordPress.

Step 3: From the dashboard, reinstall WordPress.

 7. Error in Permissions

Permissions Error is another way to fix this problem. WordPress users should be aware that permissions are required to organise and manage all files and folders.

WordPress is unable to do tasks such as uploading photos, themes, or creating files and directories due to a permission error. It could potentially jeopardise the security of your WordPress site.

The following recommendations would help to allow WordPress to create files and directories –

1. Use 644 (-rw-r–r–) or 640 for all files.

2. Use 755 (drwxr-xr-x) or 750 for all directories.

You may now fix the Permissions problem by following the steps below –

Step 1: Use an FTP client to connect to your site.

Step 2: Go to your site’s root folder and select all of the directories.

Step 3: Select File Permissions from the context menu by right-clicking on it.

Step 4: In the File Permissions box, type 755 in the numeric value and then click Recurse into Subdirectories.

Step 5: Next, select Only apply to folders and then OK.

File permissions to folders will now be settled by the FTP clients. After that, repeat the procedures to allow the FTP client to set file permissions for all files on the site.

Step 1: Return to the root folder and select all files and folders. Right-click it and select File Permissions from the menu.

Step 2: A dial box will appear; in the numeric value field, type 644. Then select Recurse into subdirectories from the menu.

Step 3: After that, select Only apply to files. Click the OK button.

8. PHP Memory Limit 

Increase the PHP memory limit is the next option on the list. A PHP memory limit that has been reached can result in a 500 internal server error. The instructions below will show you how to increase the PHP memory limit –

In cPanel, increase the PHP memory limit.

Step 1: Select the PHP version you want to use.

Step 2: Next, select Switch to PHP Options from the drop-down menu.

Step 3: Simply alter the value of Memory Limit by clicking on it.

Step 4: Select Save.

In wp-config.php, increase the PHP memory limit.

Step 1: Use FTP to access your WordPress site.

Step 2: Navigate to the site’s root folder and look for wp-config.php.

Step 3: In this file, paste the following code.

define(‘WP MEMORY LIMIT’,’128M’); define(‘WP MEMORY LIMIT’,’128M’); define(‘WP MEMORY

Apache’s PHP Memory Limit should be increased.

Step 1: Use FTP to access your website.

Step 2: Navigate to the site’s root folder and look for the.htaccess file.

Step 3: After you’ve downloaded the file, add the following code to it and try to raise the memory limit above 64M. php value memory limit 128M

In the php.ini file, increase the PHP memory limit.

Step 1: Use FTP to access your website.

Step 2: Navigate to the site’s root folder. Now look for the php.ini file.

Step 3: Once you’ve discovered it, check for the options and make the necessary changes.

If the php.ini file is missing, you can create one. Add the provided code and change it to your liking –

128M memory limit

For the aforementioned php.ini file settings to operate, you may need to add the suPHP directive to your.htaccess file in some circumstances. Make adjustments to your.htaccess file, which is placed in the site’s root folder, to make it operate. Add the following code to the top of the file –

IfModule mod suphp.c mod suphp.c mod suphp.c mod suphp.c mod s

suPHP ConfigPath/home/yourusername/public html

</IfModule>

9. Problems with Your.htaccess File 

The next option is to work with your.htaccess file to resolve the issue. It’s essentially a secret file that allows the user to configure the Apache webserver’s server settings. The.htaccess file can become corrupted at any time.

With the help of the instructions below, you may quickly make a new one:

Step 1: Use FTP to access your website. .htaccessold is the new name for your file. Keep track of your permalinks.

Step 2: If you can’t get it to work, try creating a new.htaccess file. Now, add the following content to your server and upload it.

# MODULE MOD REWRITE.C MODULE MODULE MODULE MODULE MODULE MODULE MODULE MODULE MODULE MODULE
On RewriteBase / RewriteRule index.php RewriteEngine
$ – [L] RewriteCond percent REQUEST FILENAME!-f RewriteCond percent REQUEST FILENAME!-d RewriteCond percent REQUEST FILENAME!-d
/index.php RewriteRule [L]
</IfModule>
# WORDPRESS FINISH

Check to see if the problem has been solved; if not, move on to the next procedure.

 10. CGI/Perl Script Coding or Syntax Errors

This issue can be caused by coding or syntax errors in your CGI/Perl script. When working with CGI scripts, simply follow these guidelines –

1. Always use a plain text editor to keep your documents in ASCII format.

2. Make sure the Perl modules you’ll need for your content are installed.

 11. A Problem with the Server (Check with Your Host)

PHP timeouts or catastrophic errors PHP problems are also a common source of 500 internal server errors. In this case, it’s a good idea to check in with your WordPress server on a regular basis. Messages like these will appear when you encounter certain issues.

This type of problem is a little more difficult to fix. It may also necessitate the assistance of a professional. If you’re a Kinsta user, you’ll always have the advantage of receiving early notice of a problem, and they’ll start repairing it right away.

PHP timeouts are caused by a shortage of PHP workers. It occurs when these staff become preoccupied with managing the site, which causes a line to form. Once it reaches the limit, it begins to push it.

Keep an eye on your website.

You can use the updown.io tool to stay informed about these problems in the future. It’s a free programme that sends an HTTP HEAD request to the URL to monitor your website on a regular basis. If the site goes down, you will be notified through email or SMS.

It’s also a good idea to choose a managed WordPress host because it comes with a lot of benefits. You will be rewarded with the following benefits:

1. You will receive superior assistance.

2. High-Performance Optimized

3. Backups that are performed automatically (Never Lose Your Data)

4. Security is a top priority.

5. It was designed to be scalable.

6. Staging Environments with a Single Click

7. Programmer-Friendly (SSH, Git, WP-CLI)

Read Also:

  1. Chrome Won’t Open
  2. Kernel Security Check Failure
  3. IRQL_NOT_LESS_OR_EQUAL

Conclusion

The 500 internal server error is an extremely annoying and aggravating issue. To solve it, you’ll need a lot of patience and time. The solutions outlined above will assist you in resolving the error that occurred during the process.

Make sure to update your plugins, themes, and WordPress site documents on a regular basis. Also, we hope that this post will assist you in resolving the error; nevertheless, if you continue to have problems, please contact an expert.