Home Blog Page 4

How To Fix The ‘Origin Online Login Is Currently Unavailable’ Error on Windows

Error
Error

Electronic Arts had developed a platform named Origin. They made it a digital distribution platform for purchasing and playing video games. The Origin application is self-updating software that guides the user to download games, content booster packs, and patches.

They made the application available on both PC and mobile platforms. Because of its features, it was a major success and it had 50 million registered users.

But as not every application is perfect. Origin users started to face a problem while trying to login to their account. The problem was ‘Origin Online Login Is Currently Unavailable’ phrase used to pop-up on the user’s screen.

When users started to face this problem on a high percentage, it became a common yet frustrating issue for both launchers of the application and users.

As many violent comments and reviews started to float online stating: the games could not be played properly as there was no Origin login currently available.

Error
Error

There are some ways the users can solve this problem on their own regardless of running after the customer services online.

The following solutions and their steps would guide the users to solve their problems. But before the solution, it’s important to know how the problem was caused in the first place.

Read Also:

  1. Printer Driver is Unavailable
  2. ERR_QUIC_PROTOCOL_ERROR
  3. Error Loading Player No Playable Sources Found

What Causes the Origin Online Login Is Currently Unavailable Error on Windows?

There are many different root causes of an online login error. One should always know them all before experimenting with any kind of solution to their computer. Here are the three most common causes of the origin online login error:

  • Time and date are set incorrectly: The most important thing in the digital world is the correct time and date according to the respective time zones. Almost all of the online services require exact and current time and date to function correctly. An incorrect time or a few minutes can cause the problem too. Time and date when set correctly in the PC settings by the user can solve this problem.
  • Internet Explorer settings: The launcher depends on the internet explorer and its features to work sometimes. If the Internet Explorer’s settings are customized, the user can always go to the Internet Explorer’s settings and reset it to default helping the Origin launcher to work properly.
  • Network-related issues: Networking protective measures mat tend to cause this error too. If the user tries to unblock the Origin launcher from the Windows Firewall, resetting and clearing the hosts’ file and cache memory, the error may be resolved.

Solution 1: Check the Time and Date on Your Computer

Online service and digital platforms use and take for granted the time and date set up on the user’s computer is correct. These actions are done to prevent numerous security issues. Their settings to be set properly is very necessary.

The following steps will guide the users to set time and date properly in their respective computers.

Step 1: Click on the Windows 10 Start Menu followed by the Settings app on the left panel; the cog icon just above the power icon. The user can also use the Windows key + I key combination or shortcut alternatively to open the Settings application directly.

Step 2: Click on the Time & Language section to open it and navigate through the Date & Time tab from the left panel of the window.

Step 3: The user should make sure that the date and time are correct. If the date and time are not set correctly, the user can correct it by turning on or off the Set time automatically option, depending on their respective sates.

Step 4: If the user needs to change the date, then they should make sure that the Set time automatically is turned off. Then, click on Change option under Change date and time. Once the user clicks on the change option, a small window will pop up stating Change date and time on the top of the window. The user then needs to click on the dropdown menu to find the current date and month on the calendar.

Step 5: To change the time, the user needs to click on the hour, minutes, or seconds that is desired to be changed, siding down till the value is settled according to the location.

Step 6: The user can now click OK after modifying it.

Alternative

Many people succeed and many of them failed to fix their issue by performing the steps to be done by adjusting into the settings menu. You can also do the same in Control Panel. Though these are similar to each other here, the user can now set the time to sync with the Internet time.

To execute it the user needs to follow the steps that are undermentioned.

Step 1: Search for the Control Panel by clicking on the Start button at the bottom left corner of the screen or by clicking the Cortana button on the left side of the taskbar. Apart from these, you can also use theWindows key + R key combination to open Run.  Also, you can type “exe” in the Run box followed by clicking OK to run the Control Panel.

Step 2: When the Control Panel window opens up, the user can always change the view to large or small icons to display the categories. The user can then search and navigate through the entire window and open the Date and Time From the current Date and Time tab the user has to click on the Change date and time button at the top and set up there.

Step 3: However the user can also choose to synchronize time with an online server by clicking on the Internet Time tab in the Date and Time window followed by the Change settings. The users should check the box next to the Synchronize with an Internet time server. Click on the Update now button. Then the user needs to click on OK, followed by Apply, OK, and finally close the Control Panel.

 Once the user has followed and completed all the steps mentioned above, the error should be fixed in no time.

Solution 2: Reset Internet Explorer Settings to Default

There is a myth among many people that Internet Explorer takes up unnecessary space in their device. But in reality internet settings goes through Internet Explorer.

Therefore, sometimes resetting the Internet Explorer settings have solved Origin’s online login error. For many users, this solution has been successful and effective.

The following steps would help any user to reset Internet Explorer settings and thus, implement this solution:

Step 1: The user has to open the Internet Explorer (they can do so by searching and double-clicking on its icon either on desktop or on the apps menu). Then the user has to click on the tools option (it would normally be on the top right corner of the page of the window). Then lastly the user has to select Internet options from the pop-up menu.

Note: If any user cannot open the Internet options with the above guidance, then they could access it by opening the Control Panel application and searching for it, and then they could find network and internet options under that view up/ category options. Under the network and internet option, the users would find the internet button.

Step 2: Then the user has to find to the advanced tab and then connect it which would open up a new window where the user has to select the Reset option and then click on the Delete Personal Settings checkbox.

Note: If the user prefers to remove their browsing history, home pages, search providers, etc. They can do so by resetting their browser.

Step 3: After the last step the user will find a reset Internet Explorer settings dialog box on the next window. Then the user has to click on reset.

Step 4: Lastly the user has to wait for the Internet Explorer to finish all the new settings and then they have to click on close followed by OK.

Step 5: Lastly the user has to check whether the problem has been solved or not.

Solution 3: Disable Pop-Up Blocker in Internet Explorer

Many users have tried this solution and stated that they have just blocked the pop-up ad blocker in the Internet Explorer. We observed that the pop-up blocker interferes with the Origin. Thus, it creates the Origin Online Login error.

The following steps would help the users to do so:

Step 1: The user has to open Internet Explorer. They can do so by searching and double-clicking on its icon either on desktop or on the apps menu. Then the user has to click on the tools option (it would normally be on the top right corner of the page of the window). Then lastly the user has to select Internet options from the pop-up menu.

Step 2: Search for the Control Panel by clicking on the Start button at the bottom left corner of the screen or by clicking the Cortana button on the left side of the taskbar. Apart from these, you can also open it by using Windows key + R key combination to open Run. Also, you can type “exe” in the Run box and click on OK to run the Control Panel.

Step 3: The user then has to select View as category (The user can find this on the top right corner of the windows screen). Then the user has to select Network and Internet options from the new list that comes up under the window. After that, the user has to find internet options in order to navigate themselves to the same screen that they would encounter if they had selected an open internet explorer.

Step 4: The user then has to go to the Privacy tab and click on the pop-up blocker section. Then they have to uncheck the box which is next to turn on pop-up blocker.

Step 5: The user has to make sure that they click on Apply and the changes have been successful. Lastly, they have to restart their computer and see whether the problem has been solved or not.

Solution 4: Clear Origin Cache

Sometimes very simple steps can solve complicated problems. Similarly, sometimes clearing the online Origin cache can also solve the problem. The following steps can help the user to solve their problem by this method.

Step 1: The user has to follow the path mentioned below under This PC:

C:\Users\YOURUSERNAME\AppData\Roaming\Origin

Step 2: After that, the user has to select AppData

 Note: If any user is unable to find the AppData folder, they might have to enable the option hidden file and folders under View Menu.

Step 3: Then the user has to delete the Origin folder which should be under the Roaming folder.

 Note: If the user receives a message conveying that some files were not deleted due to they were being used.

Step 4: Search for the Control Panel by clicking on the Start button at the bottom left corner of the screen. Else, click the Cortana button on the left side of the taskbar. Apart from these, you can also use the Windows key + R key combination to open Run. Also, you can type “%PROGRAMDATA%” in the Run box and click on OK to run the Control Panel.

Step 5: Once a new window opens, the user has to find the origin folder. After opening it the user has to select all the files and folders inside it except for LocalContent Then the user has to select delete from the selection option which will be under the context menu.

Step 6: Lastly, the user has to restart their computer and check if the Origin Online Login is Currently Unavailable error has solved or not.

Solution 5: Reset the Hosts File

Every computer has a computer file named hosts, which is an operating system file whose job is to map hostnames to IP addresses. It is a plain text file. Sometimes if for some reason if the host file is compromised.

The user is facing the Origin online login error then resetting the host file would help to solve the problem.

The following steps will help the user to do so:

Step 1: Firstly the user needs to open the File Explorer. Then click on This PC or My Computer and then they have to open Local Disk (C). They have to find the location given below:

C: Windows\System32\Drivers\Etc

Step 2: After that, the user has to select Windows

Note: If any user is unable to find the Windows folder, they might have to enable the option hidden file and folders under View Menu.

 Step 3: The user has to find the hosts file in the Etc folder and open it in notepad. Once all the contents are opened notepad, the user can select all. Then, delete it and write the following text inside:

# Copyright (c) 1993-2006 Microsoft Corp.
#
# This is a sample HOSTS file used by Microsoft TCP/IP for Windows.
#
# This file contains the mappings of IP addresses to hostnames. Each
# entry should be kept on an individual line. The IP address should
# be placed in the first column followed by the corresponding host name.
# The IP address and the host name should be separated by at least one
# space.
#
# Additionally, comments (such as these) may be inserted on individual
# lines or following the machine name denoted by a '#' symbol.
#
# For example:
#
#      102.54.94.97     rhino.acme.com          # source server
#       38.25.63.10     x.acme.com              # x client host
# localhost name resolution is handled within DNS itself.
#       127.0.0.1       localhost
#       ::1             localhost

Step 4: Lastly, the user has to save all the changes made and close the Notepad application. Then restart their computer and check their problem.

Solution 6: Allow Origin Through Windows Defender Firewall

Sometimes, the Origin service cannot reach to the internet may be because the user has to allow the internet access through Windows Defender Firewall. The user can do so by following the steps below:

Step 1: The user has to open up the Control Panel. After that, the user has to open Windows Defender Firewall inside it.

Step 2: After that the user has to click on Windows Defender Firewall and then select. Allow an app or feature through Windows Firewall option. It will be on the left side list of the options on the windows screen. After that, a list of applications will open up in front of the user. Then, click on the Change Settings button (which will be visible on the top of the screen).

Step 3: The user then has to go where they have installed Origin. Then they have to open the folder and choose the app’s executable file Origin.exe.

Step 4: Then, click on the Network types (which will be on the top of the new window). The user has to make sure that the private and public entries have been checked before clicking Add and OK.

Step 6: Lastly, the user has to restart their computer and check if they can log in to Origin properly.

Read Also:

  1. Chrome Won’t Open
  2. Kernel Security Check Failure
  3. IRQL_NOT_LESS_OR_EQUAL

CONCLUSION

Hopefully, the above methods will help the users to resolve the error. The users will get rid of the error easily.

How To Fix Error Code ‘0x80073712’ in Windows 10

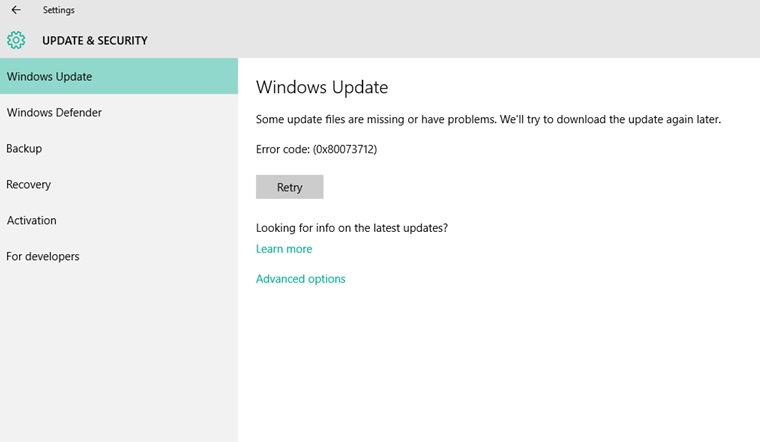
Update Error Code 0x80073712 in Windows 10

Windows 10, Microsoft’s popular operating system, offers users a robust computing experience with various features and functionalities. However, like any software, Windows 10 is not immune to errors, and one such error that users may encounter is the “0x80073712” error.

This error code can be perplexing and disruptive, especially when it prevents you from performing essential tasks such as updating or installing software.

In this comprehensive guide, we will explore the meaning of the “0x80073712” error in Windows 10, its significance, potential causes, and effective solutions to help you resolve this issue and keep your Windows system running smoothly.

Update Error Code 0x80073712 in Windows 10

Understanding the 0x80073712 Error

Before delving into the details, let’s break down the error code itself:

  • “0x80073712” is a hexadecimal error code that Windows uses to indicate a specific issue or problem.
  • This error code typically appears when there is a problem with the Windows Update service or the Windows Component Store (also known as the WinSxS folder).

In essence, the “0x80073712” error occurs when Windows 10 encounters difficulties while trying to access or manage system components, particularly during the Windows Update process.

Read Also:

  1. Outlook Won’t Open
  2. DNS_Probe_Finished_NXDomain
  3. How to Fix USB Ports Not Working

Common Symptoms of the Error

When you encounter the “0x80073712” error in Windows 10, you may experience the following symptoms:

  1. Error Message: The primary symptom is the appearance of an error message that explicitly states “0x80073712.”
  2. Windows Update Issues: The error often prevents Windows Update from completing successfully, leading to failed update installations or the inability to check for updates.
  3. Software Installation Problems: You may encounter difficulties when attempting to install or update software packages, as the error can interfere with the installation process.

Now that we understand the symptoms, let’s explore the potential causes of the “0x80073712” error.

Possible Causes of the Error

To effectively troubleshoot and resolve this error, it’s crucial to identify its underlying causes. Here are some common reasons behind the “0x80073712” error in Windows 10:

  1. Corrupted System Files: The error often occurs due to corrupted or missing system files, particularly those related to the Windows Component Store.
  2. Windows Update Service Issues: Problems with the Windows Update service, such as a malfunctioning update component or incorrect configuration, can trigger the error.
  3. Third-Party Software Interference: Certain third-party software, including antivirus or security programs, may interfere with Windows Update or the system’s component management.
  4. Incomplete or Failed Updates: If previous Windows updates were not installed correctly, it can lead to the “0x80073712” error when attempting to install new updates.

Now that we’ve identified the potential causes, let’s explore the solutions to fix the “0x80073712” error:

How to Fix Windows Update Error 0x80073712

There are a few methods to solve this error. With proper guidance and steps, the users would be able to completely eradicate the Update Error 0x80073712 from its roots.

Method 1 – Run the Windows Update Troubleshooter

Every Windows operating system has an inbuilt troubleshooter, and it has proved to work very efficiently in solving many problems in the system. So here are the steps the users could use for applying the troubleshooter application in the system:

Step 1 – The user can search for the application by pressing the Windows key and then typing the application’s name. [The user has to click on the option troubleshooting under the control panel.]

Step 2 – Then the user has to click on the fix problems of updates under the System and Security.

Step 3 – After that last step, the application of troubleshooting would start. The application would find the problem and highlight it after solving it. The user has to wait until the running of the scan gets completed.

Step 4 – After that, the user has to try updating the window again. If they find the Windows Update Error 0x80073712 again then they have to try a different solution.

Method 2 – Using the System Update Readiness Tool

Users don’t always release that they might have to use this tool to prep their window 7 device for the update to window 10. And sometimes using this tool actually helps in solving this problem.

The following steps would help the users to do so:

Step 1 – The user has to download the tool from here

Step 2 – Then the user has to run the tool in their device. And then the user has to follow the onscreen instructions

Step 3 – After the scan gets over the user has to check if their problem is solved or not.

Method 3 – Use Windows Media Creation Tool

Sometimes this issue is not fixed till the user performs an in-place update. In this solution, we recommend using the Windows Media Creation tool for performing the in-place update. The following steps would help in doing so:

Step 1 – First, the user has to download the app Windows Media Creation tool

Step 2 – Then they have to accept the prompts and pop-up Windows.

Step 3 – Then the user has to select the “Upgrade this PC Now” option.

Step 4 – Then they have to select the “Keep Personal Files” option and in the next prompt that the user has to click on the install option.

Step 5 – After that, a set up would start, the user has to wait till it finishes. Then see if the Error 0x80073712 still stays or not.

Method 4 – Run the DISM

Just like the troubleshooting application. The system has many other in build applications. Among which there is a tool name Deployment Image Servicing and Management Tool. The tool serves Windows.

And can help in solving any kind of problem with the Windows updates. Many people around the internet server stated that this had helped them solve the problem too

The following steps would help the user to implement the solution:

Step 1 – The user has to press the Windows key and X key, together and then select the Command Prompt (Admin) from the menu what will pop-up on the window [the user can also Click on Start and then type cmd in the box after that the user has to right-click on cmd and lastly they need choose Run As Administrator.

Step 2 – When the command prompt opens up the user has to put in the following commands into the box:

DISM.exe /Online /Cleanup-image /Scanhealth
DISM.exe /Online /Cleanup-image /Restorehealth

Note – The users have to be careful while inputting these commands on their computer, as anyone small mistake can hamper their computer or other devices. The user has to make sure that they press “enter” after every command for it to get implemented. And the user has to make sure that the first command is completed before they start implementing the second one.

Step 3 – The user has to wait until all the commands have been applied correctly. And then they have to close this application by either clicking on the close icon or by typing exit and then press Enter.

Step 4 – After that lastly, the user has to run the updates again and check if the Update Error 0x80073712 has been solved or not.

Method 5 – Reset Basic Elements Using Commands

Many times, these kinds of problems can be solved by using and inputting very simple commands. Some users have used this method and they have stated that it has been effective in rooting up their problems.

The following steps would help other users to solve their problems too:

Step 1 – The user has to open the run dialog box (they can do it by pressing Windows key and R key together).

Step 2 – Then they have to type in the box “cmd” and then press shift control and enter together to get the administrative privileges.

Step 3 – After that, the user has to put in the following commands in the window that opens up next:

net stop trustedinstaller

cd %windir%\winsxs

takeown /f pending.xml /a

cacls pending.xml /e /g everyone:f

del pending.xml

net stop wuauserv

ren c:\Windows\SoftwareDistribution softwaredistribution.old

net start wuauserv

Step 4 – After putting all the commands in the device, the user has to finally check if their Error Code 0x80073712 has been solved or not.


Also Read:


Conclusion

The “0x80073712” error in Windows 10 can be frustrating, but with a clear understanding of its causes and the appropriate troubleshooting steps, you can often resolve this issue and ensure your Windows system remains up to date and functional.

By following these solutions and maintaining a proactive approach to system maintenance, you can efficiently troubleshoot and resolve the “0x80073712” error, ensuring a stable and reliable computing experience.

How To Fix ‘IRQL_NOT_LESS_OR_EQUAL’ STOP CODE Guide

Error
Error

It’s a BSoD (Blue Screen Of Death) problem that occurs as Windows is going to start up. The most likely cause is that you are using an older version of the software or that there is a problem with the hardware or software.

You should keep an eye on the RAM diagnostics and update them on a frequent basis. You can learn more about Windows 10 Errors Troubleshooting in our Windows 10 Errors Troubleshooting section.

Error
Error

To cope with your various PC difficulties, we highly recommend and suggest people to utilise the Restoro PC Repair tool. This software has a number of advantages, including the ability to protect your computer against viruses, Trojans, and software malfunctions, as well as improve computer speed.

Before you can use it, you must first install it, which is a simple process. To figure out different problems on your computer, first download Restoro PC repair tool from TrustPilot.com, then launch it and select Start Scan choices.

The next step would be to choose Repair All to resolve the issue. Every Windows user has probably encountered the BSoD problem at some point in their lives, which is caused by an incompatible system.

We can use that as a reference as we addressed how to deal with the problem of DPC WATCHDOG VIOLATION before. However, Windows users continue to receive the IRQL_NOT_LESS_OR_EQUAL problem.

Read Also:

  1. 500 Internal Server Error
  2. ERR_EMPTY_RESPONSE
  3. Origin Online Login Is Currently Unavailable

STOP CODE IRQL_NOT_LESS_OR_EQUAL

We’ll try to shed some light on some of the problem’s potential remedies. We’ve seen a problem like this before, with ntoskrnl.exe, which was caused by Realtek HiDefinition Audio drivers. The following are some of the scenarios in which this issue could occur:

Irql must be greater than or equal to ntoskrnl.exe: This is the operating system’s central component that alerts you to the problem.

This issue generally happens when gaming. IRQL_NOT_LESS_OR_EQUAL overclocks: Disabling the overclocking option is one possible solution.

Irql must be greater than or equal to Overheating of the CPU: Various apps or software on the PC might put strain on the CPU, causing it to heat up. As a result, there should be a good cooling system in place to keep it from overheating.

After RAM upgrading, Irql must not be less than or equal to: When you replace your RAM, the BSoD error can also occur. Make that your RAM is compatible with your computer and that it is installed correctly and without errors.

IRQL_NOT_LESS_OR_EQUAL after Windows update: Although unlikely, the problem can occur after you have completed your Windows update.

IRQL_NOT_LESS_OR_EQUAL and memory management: When one of these errors occurs, the other will follow. The RAM modules, which play a big role in this, are the fundamental reason for this. Let’s take a closer look at why this happens.

A system incompatibility, malfunctioning hardware, or a Windows update could all be factors. The device driver will also throw an error if it tries to reach a PC location to which it does not have access.

Understanding the IRQL_NOT_LESS_OR_EQUAL Error

Before we dive into the details, let’s break down the stop code error itself:

  • “IRQL” stands for “Interrupt Request Level,” which is a fundamental part of how a computer’s hardware communicates with the operating system.
  • “NOT_LESS_OR_EQUAL” indicates that a problem occurred when trying to execute a certain action or process involving interrupt requests.

In essence, the “IRQL_NOT_LESS_OR_EQUAL” stop code error occurs when there is an issue related to how your computer’s hardware components interact with the Windows operating system, particularly when dealing with interrupt requests. This error can lead to system instability and crashes.

Common Symptoms of the Error

When you encounter the “IRQL_NOT_LESS_OR_EQUAL” stop code error, you may experience the following symptoms:

  1. Blue Screen of Death (BSoD): The primary symptom is the appearance of the blue screen with the error message, followed by an automatic system restart.
  2. System Crashes: The error often leads to system crashes, which can result in data loss if you have unsaved work.
  3. Frequent Restarts: Your computer may enter a cycle of restarting, attempting to recover from the error.

Now that we understand the symptoms, let’s explore the potential causes of the “IRQL_NOT_LESS_OR_EQUAL” stop code error.

Possible Causes of the Error

To effectively troubleshoot and resolve this error, it’s crucial to identify its underlying causes. Here are some common reasons behind the “IRQL_NOT_LESS_OR_EQUAL” stop code error:

  1. Driver Issues: Outdated, incompatible, or corrupted device drivers are a common cause of this error. This includes drivers for hardware components such as graphics cards, network adapters, and storage controllers.
  2. Faulty Hardware: Hardware components that are failing or malfunctioning, such as RAM (Random Access Memory), can trigger the error.
  3. Software Conflicts: Conflicts between software applications or third-party drivers can lead to the error. This can include antivirus or security software.
  4. Overclocking: Overclocking your CPU or RAM beyond their stable limits can result in system instability and the “IRQL_NOT_LESS_OR_EQUAL” error.
  5. Memory Issues: Problems with your computer’s memory, including faulty RAM modules or improperly seated RAM, can cause this error.
  6. Windows Updates: Sometimes, Windows updates can introduce new bugs or compatibility issues that trigger the error.

Now that we’ve identified the potential causes, let’s explore the solutions to fix the “IRQL_NOT_LESS_OR_EQUAL” stop code error:

How Can I Fix The BSoD Problem (0x0000000A) IRQL_NOT_LESS_OR_EQUAL?

There are numerous solutions for resolving this issue. As previously stated, there are a variety of reasons, and as a result, there will be a variety of solutions.

You can experiment to see which one works best for you. Some of these are listed below and will be discussed shortly. Before continuing, ensure sure your system is up to date and that you have all of the latest drivers loaded.

First, perform a system update that affects all of your operating system’s different blocks and guarantees that you have the advanced version’s drivers loaded.

You may also check for system updates using third-party applications, and when you’ve completed all of these updates, you can upgrade your BIOS as well. A different way to this problem can be found by checking the “Event Viewer” for information about the error.

To do so, go to Event Viewer and pick charm, then utility. Look for any logs in the currently open window. Before beginning any solution, you must first erase all of the PC faults. Let’s start with the first option.

 1. Switch Your Computer 

Windows 10 gives users the option of booting into “Safe-Boot” mode, which is also known as “safe mode” in previous OS versions. You can use your computer with fewer features and drivers if you use the Minimal configuration.

This ensures that you are utilising a virus-free system with no additional tainted files. There are only two possible outcomes. Either your problem has been solved, suggesting that the third-party drivers were the reason, or it will not work, indicating that you need to dig deeper to find the root cause.

You can start Safe Mode by following the procedures listed below:

Step 1: Hold down the shift key while pressing the power button.

Step 2: Next, select the restart option.

Step 3: After that, go to Troubleshoot>Advanced options>Startup Settings>restart.

Step 4: Now you must wait for Windows 10 to reboot.

Step 5: Finally, select the safe mode option.

Step 6: Check to see if the issue is still present.

2. Examine Your Hardware and Memory

If the first option did not solve your problem, you can try this and debug the hardware part of your computer. As we previously stated, the IRQL_NOT_LESS_OR_EQUAL issue occurs when you attempt to access a memory address for which you do not have permission.

In that scenario, the first thing you need do is check and test your computer’s RAM. Also, Windows has a good option for this.

You will be given instructions on how to test your RAM.

Step 1: Type Memory Diagnostic into the search charm, then select the Windows Memory Diagnostic programme from the results.

Step 2: A new window will open with two options for you to choose from. You must choose one; the first choice will restart your computer and begin a RAM scan.

Step 3: If it returns an error, you must respond to it and replace the RAM in your computer, which must be in good functioning order.

Step 4: If your motherboard includes a Memory Caching feature, you must first disable it. Also, operating in BIOS can be risky and put you at risk, so if you aren’t aware of them, don’t make any other changes.

Hardware inspection is a demanding and time-consuming operation. You must disconnect any connected devices from your computer before disabling their drivers. After that, restart and re-enable them, then connect all of the devices.

Only install one driver at a time, and try to connect a device to a computer each time. If no errors emerge, it is safe to assume that the driver is working well and that you can move on to the next one.

Carry out the identical steps for all of the drivers until a BSOD occurs. If you see this error, it means your driver isn’t up to date, and you need to enter safe mode and install the latest driver. If it still doesn’t work, it’s possible that your driver is incompatible with Windows.

3. Refresh or Restore 

The refreshing feature of Windows allows you to restore all values to their default settings. Your personal files will not be harmed in any way. You can use this strategy without feeling tense in your mind.

Before installing any programme, you must first make your own restore point. This will be beneficial to you in the future. To begin a system restoration on Windows 10, you must complete the following steps:

Step 1: Open the search engine and type in “system properties,” then close it.

Step 2: Go to System Protection and select System Restore from the drop-down menu.

Step 3: In the new box, press next and choose a restore point that suits your needs.

Step 4: After you’ve completed picking your restore point, click next, and then finish.

Windows also offers a number of advanced recovery tools for cleaning the operating system. You can also use this approach to reset Windows:

Step 1: Go to Settings, then Update and Security, then Recovery from the left panel.

Step 2: Select the Get Started option and begin resetting your computer.

Step 3: Then, to continue, follow the commands displayed on the screen.

4. Repair

This strategy aids in the correction of your error. The quickest method is to utilise the command prompt’s System File Checker command. Then go to Start and type cmd in the search box.

Use the run as administrator option to start the command prompt. Put the sfc or scannow command there and wait for it to finish scanning. All of your corrupted or missing files will be replaced in their identical spot.

 5. Inspect Your Hard Drive 

IRQL_NOT_LESS_OR_EQUAL issue can also be caused by your disc. So make sure to check your hard drive as well. On Windows, you can easily perform this by opening Command Prompt and typing the command chkdsk C:/f there.

 6. Perform a Complete System Scan

Viruses and malware can also be a significant contributor to IRQL_NOT_LESS_OR_EQUAL errors. To detect any virus on your computer, you must run a thorough system scan. Windows comes with built-in software, Windows Defender, that runs the scan.

Write defender in the start menu. Then, to run Windows Defender, double-click on it. On the top left panel, there is a shield-like symbol. After you’ve opened it, you’ll see a scan option. To begin scanning, select the complete scan option.

 7. Install Windows 

After you’ve exhausted all other options, the last choice is to execute a fresh Windows installation.

You will need a Windows installation disc for this, as well as the ability to erase everything from the C drive and install the most recent version of Windows. Using the Windows Refresh function is the quickest and easiest way to do so.

Read Also:

  1. Printer Driver is Unavailable
  2. Error Loading Player No Playable Sources Found
  3. Digital TV Tuner Device Registration Application

Conclusion

The “IRQL_NOT_LESS_OR_EQUAL” stop code error can be frustrating, but with a clear understanding of its causes and the appropriate troubleshooting steps, you can often resolve this issue and maintain a stable and reliable computer system.

By following these solutions and adopting good system maintenance practices, you can efficiently troubleshoot and resolve the “IRQL_NOT_LESS_OR_EQUAL” error, ensuring a smoother and error-free computing experience.

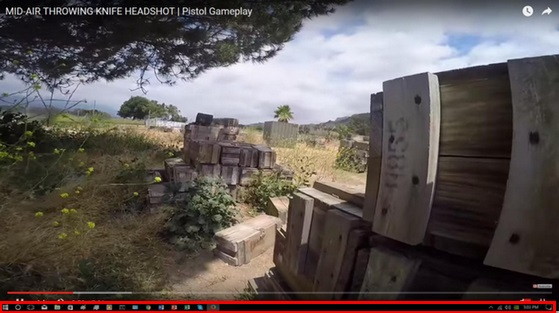
How To Fix ‘Taskbar Showing in Full Screen’ Error

Taskbar Showing in Full Screen

Windows operating systems have evolved over the years to provide users with a seamless and efficient computing experience. However, no system is without its quirks and occasional errors.

One such issue that Windows users may encounter is the “Taskbar Showing in Full Screen” error. This error can be both frustrating and disruptive, especially when it interferes with your ability to work or enjoy multimedia content in full-screen mode.

In this comprehensive guide, we will delve into the meaning of the “Taskbar Showing in Full Screen” error, its significance, what causes it, and effective solutions to help you resolve this issue and ensure a smooth, full-screen experience on your Windows system.

Taskbar Showing in Full Screen

Understanding the Taskbar Showing in Full Screen Error

Before we explore the details, let’s break down the error itself:

  • The “Taskbar” refers to the horizontal bar at the bottom of the Windows desktop that contains the Start button, open application icons, and system tray.
  • “Showing in Full Screen” indicates that the error occurs when the taskbar remains visible while you’re using an application or watching multimedia content in full-screen mode.

In essence, the “Taskbar Showing in Full Screen” error occurs when the Windows taskbar fails to hide itself automatically as it should when you’re using an application in full-screen mode.


Related Guides:-


This can be particularly frustrating when watching videos or playing games, as it obstructs the view and disrupts the immersive experience.

Common Symptoms of the Error

When you encounter the “Taskbar Showing in Full Screen” error, you may experience the following symptoms:

  1. Persistent Taskbar: The primary symptom is the taskbar remaining visible and not auto-hiding when an application or video is in full-screen mode.
  2. Reduced Screen Real Estate: The visible taskbar reduces the available screen space for your application or content, impacting your viewing or gaming experience.

Now that we understand the symptoms, let’s explore the potential causes of the “Taskbar Showing in Full Screen” error.

Possible Causes of the Error

To effectively troubleshoot and resolve this error, it’s crucial to identify its underlying causes. Here are some common reasons behind the “Taskbar Showing in Full Screen” error in Windows:

  1. Taskbar Settings: Incorrect or misconfigured taskbar settings can prevent it from auto-hiding in full-screen mode.
  2. Software Conflicts: Certain third-party software or background processes may interfere with the taskbar’s ability to auto-hide.
  3. Corrupted System Files: Corrupted or missing system files can lead to unexpected behavior, including the taskbar not auto-hiding in full-screen mode.
  4. Driver Issues: Outdated or incompatible graphics drivers can sometimes cause display-related issues, including problems with the taskbar behavior.

Now that we’ve identified the potential causes, let’s explore the solutions to fix the “Taskbar Showing in Full Screen” error:

How to Solve Taskbar Showing in Full Screen Error

Well, there is no need to be stressed about there are a few methods through which you can fix Taskbar Showing in Fullscreen issue. In this article, you will find all the conventional methods that you can apply to get rid of the taskbar won’t hide the issue.

Method 1 – Restarting Explorer.exe

Explorer.exe is a GUI app, also known as File Explorer. It is a file managing application that was included in the Microsoft operating system Windows to help users to access their file system.

Many users claimed that their issue of taskbar showing in full-screen mode was resolved when they restarted their file explore as it is the main medium of navigation in your Windows machine, therefore, there is a possibility that your issue will be resolved after restarting your file explorer.

To implement the method, follow the steps mentioned below.

Step 1 – Firstly, press Windows key + R, this will open the Run Application.

Step 2 – Now in the dialog box type ‘taskmgr’ to open your systems task manager.

Step 3 – Next, click on the tab named Processes situated on top of the window.

Step 4 – Now, search for the task of Windows Explorer in the list of Processes. Click on it and then press the ‘Restart’ button you will find at the bottom left side of the Window.

Read Also:

  1. WLDCore.Dll
  2. Player No Playable Sources Found
  3. 403 Forbidden
  4. Bad Pool Header Error in Windows 10

Method 2 – Overriding high DPI Scaling Behaviour in Chrome

If the method mentioned above did not work for you, then you can try overriding high DPI scaling behavior in Chrome. This solution might fix your issue. Follow the steps mentioned below for implementation.

Step 1 – First, right-click on the Google Chrome icon present on your taskbar, then again right-click on Google Chrome mentioned in the list and at last select Properties.

Step 2 – Now, in properties, go to the Compatibility tab that you can find at the top of the screen.

Step 3 – Further, in the settings tab, select the line that says ‘override high DPI scaling behavior.’

Step 4 – Later, click on Apply to save changes and the exit from the Window.

Step 5 – Finally, restart your Google Chrome to check the issue has been resolved or not.

Method 3 – Turning Visual Effects Off

If the solutions mentioned above were unable to solve your problem, then there might be a possibility that this issue still persists due to your Windows.

Window’s visual effects are generally known to mess with other applications. So you can try turning off your Windows visual effects and see if it changes anything.

Step 1 – Firstly, press Windows key + R, this will open the Run Application.

Step 2 – Now in the dialog box type ‘Control Panel’ to open your systems Control Panel.

Step 3 – Now, in Control Panel, go to System and Security.

Step 4 – Next, go to the sub-heading System, and after it opens, click on the Advanced System Settings.

Step 5 – Further, a new window will pop up. In that window, go to the advanced tab and click on settings of the Performance category.

Step 6 – At last, click on the checkbox in front of ‘Adjust for Best performance‘ then save and exit.

It will probably solve your current problem.


Other Solutions:-


Conclusion

The “Taskbar Showing in Full Screen” error in Windows can be disruptive, but with a clear understanding of its causes and the appropriate troubleshooting steps, you can often resolve this issue and enjoy a seamless full-screen experience.

By following these solutions and maintaining a proactive approach to system maintenance, you can efficiently troubleshoot and resolve the “Taskbar Showing in Full Screen” error, ensuring an uninterrupted and immersive experience when using applications or viewing content in full-screen mode on your Windows system.

How To Fix ‘Kernel Security Check Failure’ Error in Windows 10

Error
Error

Windows 10, one of Microsoft’s most widely used operating systems, is known for its stability and security. However, like any complex software, it is not immune to errors and issues.

One such error that Windows 10 users may encounter is the “Kernel Security Check Failure” error. This error can be alarming, as it often results in a system crash, commonly known as the Blue Screen of Death (BSoD).

In this comprehensive guide, we will explain the meaning of the “Kernel Security Check Failure” error, its significance, what causes it, and effective solutions to help you resolve this issue and ensure the stability of your Windows 10 system.

Error
Error

Understanding the Kernel Security Check Failure Error

Before we dive into the details, let’s break down the error itself:

  • “Kernel” refers to the core part of the operating system that manages hardware, memory, and system resources.
  • “Security Check Failure” indicates that a problem occurred while the kernel was checking the security of system processes and data.

In simpler terms, the “Kernel Security Check Failure” error occurs when the Windows 10 operating system detects a security issue related to the kernel, which can result in a system crash to prevent potential damage or data loss.

Read Also:

  1. ERR_EMPTY_RESPONSE
  2. 500 Internal Server Error
  3. Origin Online Login Is Currently Unavailable

Common Symptoms of the Error

When you encounter the “Kernel Security Check Failure” error in Windows 10, you may experience the following symptoms:

  1. Blue Screen of Death (BSoD): The primary symptom is the appearance of the blue screen with the error message, followed by an automatic system restart.
  2. System Crashes: The error often leads to system crashes, causing your computer to unexpectedly shut down and restart.
  3. Data Loss: In some cases, a BSoD caused by this error can result in data loss if you have unsaved work.

Now that we understand the symptoms, let’s explore the potential causes of the “Kernel Security Check Failure” error.

Possible Causes of the Error

To effectively troubleshoot and resolve this error, it’s crucial to identify its underlying causes. Here are some common reasons behind the “Kernel Security Check Failure” error in Windows 10:

  1. Faulty Hardware: Hardware components such as RAM (Random Access Memory), hard drives, or SSDs that are failing or malfunctioning can trigger the error.
  2. Outdated or Incompatible Drivers: Corrupted, outdated, or incompatible device drivers, especially those related to hardware components like graphics cards or network adapters, can lead to the error.
  3. Software Conflicts: Conflicts between software applications or third-party drivers can cause the error. This includes antivirus or security software.
  4. Memory Issues: Problems with your computer’s memory, including faulty RAM modules or improperly seated RAM, can result in the error.
  5. Corrupted System Files: Corrupted or missing system files can lead to unexpected behavior, including the “Kernel Security Check Failure” error.
  6. Overclocking: Overclocking your CPU or RAM beyond their stable limits can result in system instability and the error.
  7. Windows Update Issues: Problems with Windows updates or incomplete updates can trigger the error.

Now that we’ve identified the potential causes, let’s explore the solutions to fix the “Kernel Security Check Failure” error:

Kernel Security Check Failure Error in Windows 10

The popularly known ‘Kernel security check failure Blue Screen of Death (BSOD)’ error has been reported the enormous number of users. In this article, we have explained why this error arises and how to fix it efficiently.

There are a number of reasons as to why this error occurs, for instance, memory issues, virus infections, etc. The most prominent one is that when you update your Windows to a new version and few of the system drivers are not compatible with some features of the updated version. Thus, fails working well.

As a result, this error could lead to two misfortunes – users can either enter into their Windows 10 PC and the error “Kernel Security Check failure” Blue screen of Death keeps displaying every now and then or users might not be able to log in to their operating system as the system pops up the error message whenever it is switched on.

This is quite frustrating to those users who work with their system often.

Methods to Fix Kernel Security Check Error

Follow every step mentioned in this article to resolve your error.

Method-1: Enable Legacy Advanced Boot Menu

Step-1: All you need is a Windows 10 system and an optical drive to implement this method. Now restart your computer and insert Windows 10 bootable media into the optical media drive. In case you are baffled as to how to create Windows 10 bootable media than visit the link mentioned below and proceed further.

Step-2: Then click Next on the Windows setup box.

Step-3: In the proceeding page, locate Repair your computer option and tap on it.

Step-4: Here you will be asked to choose an option from the listed buttons, click on Troubleshoot option.

Step-5: Under the troubleshoot section, click on Advanced options.

Step-6: From the Advanced options window, choose Command prompt and open it.

Step-7: On the command prompt type C: in the command line and hit Enter.

Step-8: As you can see you have now entered the C drive, so type the command given below and hit enter to enable the legacy advanced boot menu.

BCEDIT/SET {DEFAULT} BOOTMENUPOLICY LEGACY.

Step-9:  After executing the required commands, exit the command prompt by typing EXIT onto the command line and pressing enter.

Step-10: Finally go to the previous ‘Choose an option’ Screen again and this time clicks on Continue and starts your system normally.

In case this method didn’t seem to resolve your error, do not worry we have many methods left to try.

Method-2: Use System File Checker and Memory Diagnostic

Step-1: In case you have trouble launching your system normally or Windows 10 seems to fail every time you launch the system then go to Settings > Advanced Startup and open the ‘See advanced repair options’ menu.

Step-2: Now from the listed options choose troubleshoot and tap on it.

Step-3: Then visit the Advanced options window and click on Startup Settings.

Step-4: Reboot the system by clicking on the Restart button found on the bottom right side of the screen.

Step-5: This should result in the system reboot.

Step-6: After the PC has been booted, launch the Command prompt window by hovering your mouse to the top right corner of the window and type cmd in the search box. Finish by pressing Enter.

Step-7: If you see command prompt option listed for you, right-click on it and select Run as administrator. Choose yes if prompted to use Administrator privileges.

Step-8: Then type the command: sfc/scannow onto the command line and hit enter.

Step-9: This command will scan your system for any corrupted or damaged files and helps the user to fix them.

Step-10: Once the scanning process is over. Type EXIT and hit enter to quit the Command prompt window.

Step-11: Again hover the mouse over to the top right corner of the screen and click on the search box.

Step-12: Type the text ‘memory’ in the search box and from the listed options. Select the Windows Memory Diagnostic option.

Step-13: right click on the mentioned option and select Run as administrator. Choose yes if prompted to work with Administrator privileges.

Step-14: Under Windows Memory Diagnostic box, choose the button Restart now and check for problems.

Step-15: Once the reboot is completed, your operating system will automatically check your system RAM and list out the reasons which could be causing the Blue Screen of Death error.

Step-16: Finally, reboot your computer normally to apply the changes and see if the Kernel security check failure error persists.

Method-3: Check the Memory Slot

One of the common and simplest reasons for the error occurrence is when the memory slot is not positioned properly into the socket. We advise you to check whether the memory slot is placed correctly into the socket for it to function productively.

In case the error seems to be reappearing often, there is no harm to try and replace the memory slot or change the slot in which it is plugged into the motherboard.

Method-4: Check your Hard Drive

It is in the best interest of you to check your hard drives regularly to make sure they are functioning properly. Also, double-check if your hard drive is correctly plugged into the device.

It is also a good thought to try changing the hard drive in case you have an extra, to check whether it starts efficiently.

Furthermore, start your operating system and see if the Windows kernel error is still displayed for you. No need to panic as we few more methods to experiment with.

Method-5: Update your PC

Even though Windows update comes up with its own set of issues, it can also solve a quite few. It is always a good habit to work with the latest version of Windows to enjoy the full system utilities. As most of us are aware that Windows constantly provides updates to enhance system performance and fix some of the issues.

Now to update the Windows to its newest version visit the Windows update section. This can be accessed by easily typing updates in the search box found at the bottom of the screen.

Move to the Windows update and check for any recent updates. If available install them.

Method-6: Scan your PC

It is indeed true that malware and various viruses cause a reasonable amount of issues in the system. Kernel security check Failure is certainly one among them.

We recommend you to run a full system scan whenever possible to detect and eradicate in case any virus is found.

To perform a full system scan you either require Windows defender, Windows built-in antivirus or the third-party antivirus applications are also equally productive.

Follow the steps mentioned below sequentially to perform a full system scan in Windows 10:

Step-1: Go to start. Type defender in the search and hit enter. Double click on the Windows defender option to start it.

Step-2: On the left corner of the screen, you can see a number of icons displayed for you. Choose the shield icon to launch the Virus and threat protection window and click on it.

Step-3: In the displayed window, click on the Advanced scan found at the bottom of the window.

Step-4: Finally check the full scan option to run a full system malware scan.

It is possible that the Windows defender might not be able to remove all the malwares it detected. In such cases, you can use third-party antivirus applications to remove the malwares.

There is a handful number of applications in the market which works best for Windows laptop. If you do not have any specific application in your mind then we recommend you download Bitdefender as it is rated as the best Antivirus in the world to safeguard your system.

Visit the link: https://www.bitdefender.com  to download Bitdefender.

If the error is not resolved even with the third-party antivirus then you might have to restore your operating system to the point where your system did not face this issue or at worst scenario reinstall your operating system.

Method-7: Check your disk for errors

Step-1: Launch command prompt on your Windows 10 system to perform disk check.

Step-2: Go to Start and type cmd in the search box and hit enter. Right-click on the Command prompt option and choose Run as administrator.

Step-3: Now type ‘chkdsk C:/f command’ onto the command line and hit enter. Users can choose their own hard drive partition if they do not want to use C.

Step-4: Remember that you need to input the above-given command as it is. For instance, if you skip /f in the command press enter then chkdsk displays a message that a certain file needs to be fixed but doesn’t fix the errors. On the other hand, the command chkdsk D:/f command will automatically detect the logical issues damaging your drives and even fixes them for you.

Step-5: At the same time to repair physical issues, run the command chkdsk D:/r, and hit enter.

The only drawback of this method is that it is time-consuming. Based on the memory of your hard drive, it can take 1-2 hours to successfully complete it.

Method-8: Kernel Security Check Failure after overclock

Some users have reported that they started experiencing the error Kernel Security Check Failure error due to the overclocking of PC. If this is the case, degenerate your computer to its default configuration and uninstall any overclocking software present in your system.

Finally, restart the system to apply the changes and see if the error still occurs.

Method-9: Run System Restore

Step-1: System Restore could retrieve a lot of damage that has been caused by various errors. For instance, if you have installed a new application/software and that is the primary reason for the error. Then System Restore will uninstall all the recent applications or drivers and take your system back to the restore point.

Step-2: Microsoft offers its Windows users a particular advantage where they can use advanced recovery options to clean the operating system. ‘Reset this PC’ recovery option might also help.

Step-3: Go to Settings > choose Update & Security > click on Recovery option under the left pane.

Step-4: Under Reset this PC option you will find a button named Get Started, tap on it. Make sure to choose to keep your files.

Method-10: Run Safe Mode

Step-1: Most of the users usually do not reset their computers in the fear of losing files. If you feel the same way too then you can boot your system in Safe Mode to discover if any of your system applications or third-party applications and software is the culprit behind these issues.

Step-2: Visit the link given: https://Windowsreport.com/safe-mode/ and implement the step by step method to enable the safe mode.

Step-3: If the error is not displayed after booting your system in safe mode, then indeed the issue emerged because of an application or software.

Step-4: Go to your task manager and enable your applications one after the other to check the application causing the error. Once found, uninstall it.

Step-5: As we saw that the above-mentioned steps will remove the ‘kernel security check failure’ error. However, if you have a hardware failure of HDD or RAM in your system, we recommend you replace it with a new one.

Read Also:

  1. Printer Driver is Unavailable
  2. Error Loading Player No Playable Sources Found
  3. Digital TV Tuner Device Registration Application

Conclusion

The “Kernel Security Check Failure” error in Windows 10 can be alarming, but with a clear understanding of its causes and the appropriate troubleshooting steps, you can often resolve this issue and maintain a stable and reliable computer system.

By following these solutions and adopting good system maintenance practices, you can efficiently troubleshoot and resolve the “Kernel Security Check Failure” error, ensuring a smoother and error-free computing experience on your Windows 10 system.

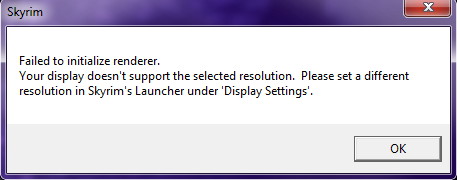
How To Fix ‘Skyrim Failed to Initialize Renderer’ Error

Skyrim Failed to Initialize Renderer

Skyrim, the acclaimed open-world RPG developed by Bethesda Game Studios, has captured the hearts of gamers worldwide with its immersive gameplay and stunning visuals.

However, even in the vast world of Tamriel, players may encounter technical issues that can hinder their adventures. One such issue is the “Skyrim Failed to Initialize Renderer” error.

This error can be frustrating, as it prevents players from launching the game and exploring the fantasy realm of Skyrim.

In this comprehensive guide, we will explore the meaning of the “Skyrim Failed to Initialize Renderer” error, its significance, potential causes, and effective solutions to help you get back to your epic adventures in the world of Skyrim.

Skyrim Failed to Initialize Renderer

Understanding the Skyrim Failed to Initialize Renderer Error

Before we delve into the details, let’s break down the error message itself:

  • “Skyrim” refers to the game itself, The Elder Scrolls V: Skyrim.
  • “Failed to Initialize” indicates that an issue occurred during the game’s initialization process.
  • “Renderer” refers to the component responsible for rendering graphics and visuals within the game.

In essence, the “Skyrim Failed to Initialize Renderer” error occurs when the game encounters a problem while attempting to initiate the rendering process, preventing it from launching successfully.

Read Also:

  1. 0x80073712
  2. How To Enable Adobe Flash Player
  3. How to Change Brightness on Windows 10

Common Symptoms of the Error

When you encounter the “Skyrim Failed to Initialize Renderer” error, you may experience the following symptoms:

  1. Error Message: The primary symptom is the appearance of an error message on your screen, stating, “Failed to Initialize Renderer.”
  2. Game Launch Failure: The error prevents Skyrim from launching, leaving you unable to play the game.
  3. Frustration: Players may feel frustration and disappointment, especially if they were eager to embark on their next adventure in the game.

Now that we understand the symptoms, let’s explore the potential causes of the “Skyrim Failed to Initialize Renderer” error.

Possible Causes of the Error

To effectively troubleshoot and resolve this error, it’s crucial to identify its underlying causes. Here are some common reasons behind the “Skyrim Failed to Initialize Renderer” error:

  1. Graphics Driver Issues: Outdated or incompatible graphics drivers are a common cause of this error. Skyrim requires up-to-date drivers to run smoothly.
  2. Missing or Corrupted Game Files: Missing or corrupted game files, either due to incomplete installations or file corruption, can trigger the error.
  3. DirectX and Visual C++ Redistributables: Issues with DirectX or the Microsoft Visual C++ Redistributable packages, which Skyrim relies on for rendering, can lead to initialization errors.
  4. Hardware Compatibility: In some cases, hardware components that do not meet Skyrim’s system requirements can result in the error.
  5. Mod Conflicts: If you have installed mods or modifications for Skyrim, conflicts between them and the base game can lead to initialization errors.

Now that we’ve identified the potential causes, let’s explore the solutions to fix the “Skyrim Failed to Initialize Renderer” error:

How to Solve Skyrim Failed to Initialize Renderer Error

Method 1 – Update Graphic Drivers

A Graphic Driver is the library files which allow an application to use the card installed in the system. The main idea behind Updating the Graphic Driver is we get better Software to squeeze as much out of each Graphic Card as possible.

Getting new drivers will speed up graphic card and gaming performance as well.

Outdated or crashed device Drivers on the computer may lead to Skyrim failed to initialize renderer error. Therefore, here are the steps to update Graphics Drivers automatically:-

Step 1 – Firstly, one has to boot the PC in safe mode and type ‘devmgmt.msc’ in the dialogue box then press Enter. Now navigate to ‘Display adapters’ and right-click on adapter and select ‘Uninstall Device’ and uninstall the driver.

Step 2 – In this step, Boot up into normal mode and press Windows key + R. In the dialogue box that appears to type ‘msc’ and hit enter key. Now, it will install the default drivers.

Follow the steps to update graphic drivers automatically. If that doesn’t work install it manually from the manufacture’s website. Once you have installed the drivers, then restart the computer. After that, relaunch your most awaited Skyrim.

Method 2 – Power Cycling the PC

In short, Power Cycling is nothing but restarting one’s computer. For suppose, if any troubleshooting or any technical issues occur restarting your computer plays a key role.

It also fixes the Skyrim Failed to Initialize Renderer error. Now, let us see how to Power Cycle the system.

Step 1 – Firstly, close all files and shut it down completely.

Step 2 – Secondly, detach the battery, press the power button, and then place the battery back after few minutes.

Step 3 – Now, restart the laptop and relaunch Skyrim.

While in case of a PC, shut it down completely and remove the main power cable. Then, after waiting for few minutes connect the main cable and check if the Skyrim Failed to Initialize Renderer error is resolved.

Thus, when one restarts the computer, it will bring the system up from scratch, restarting all the software so it will work just like before. Not only in PC’s if there are any issues in one’s electronic devices like in mobile devices or with modems restarting helps to remove some errors.


Read More:


Method 3 – Update Mods and Install the Latest Patches

Mod or Modification is a feature in a game that changes one or more aspects of a video game. This can include getting new weapons, characters, or vehicles. These mods change the etiquette of the game.

Due to changes in etiquette, there may be an error in launching a game. Therefore, it is recommended to disable or delete the mods and relaunch the game.

However, if one still gets an error then go to the official website of the game, install the latest patches and relaunch the game.

It is done because the developers always seek to improve the performance of their application by providing the best user experience. Therefore, installing the latest patches or updates brings about a host of improvements and tons of new features.

Method 4 – Launch in Windowed Mode

If we talk about the solution of Launching in Windowed mode then Resolution comes into effect. The resolution might be the reason due to which the Skyrim might not be launched. To resolve this issue, the Windowed mode is launched and follow the below steps as shown:-

Step 1 – First, open the Skyrim Launcher.

Step 2 – From the main screen, click on the options and then locate Windowed mode which is usually at the lower left side of the screen.

Step 3 – Check the Windowed Mode box.

Step 4 – Apply the changes.

Step 5 – Now, relaunch the game to check if the Skyrim Failed To Initialize Renderer error is resolved.

Therefore, launching the windowed mode can remove the Skyrim Failed To Initialize Renderer error if not go to the next solution.

Method 5 – Delete the Game Files

 This is probably another option that one can try that is by deleting the game preferences and then relaunching the game. Follow the below steps to know how to delete the game files:-

Step 1 – Before getting into it, close all games and applications.

Step 2 – Find the Stream folder and delete the appcache folder. The steam creates the file automatically while launching.

Step 3 – Then, go to the Skyrim directory. The default path is:

C:\Users\"User name"\Documents\MyGames

Step 4 – Find and delete the following files: Skyrim.ini and SkyrimPrefs.ini.

Step 5 – Now, Power off the computer and turn it back on after a few minutes.

With the above steps, one must be able to launch the game without errors. If the above method doesn’t work then one must walk through how to reinstall and update device drivers.


Also Read:


Conclusion

Thus, the Skyrim which is widely regarded as the open-world fantasy game of all time. People from all over the world play this game. Skyrim has flown to the top of the most grossing games yet, having released over 7 million copies in the first week.

The number of players fluctuates daily from over 30,000 to 70,000 per day. If anyone still faces Skyrim Failed to Initialize Renderer they can resolve it using the above solutions.

How To Fix ‘Outlook Not Responding’ Error

Outlook Not Responding

Microsoft Outlook is a tool for managing email and is an essential component in the Office suite. This information manager program extends its service to external parties and sites like Gmail and Yahoo.

With this, you can synchronize your data from Outlook, as well as third-party sources. Even though the Outlook application is popular in computer devices, many users face problems regarding Outlook Not Responding at times.

The client does not connect to specific servers and fails to respond. Outlook Not Responding error is prevalent in most of the devices that use the Outlook application and does not arise out of issues related to the Email address.

This article presents the various causes and the possible solutions for Outlook Not Responding, stuck at processing, stopped working, freezes, or hangs issue.

Outlook Not Responding

Understanding the Outlook Not Responding Error

Before we dive into the details, let’s break down the error message itself:

  • “Outlook” refers to Microsoft Outlook, the popular email and personal information management application.
  • “Not Responding” indicates that Outlook has become unresponsive or frozen and is not reacting to user input.

In simple terms, the “Outlook Not Responding” error occurs when the Outlook application stops functioning correctly and fails to respond to your commands, resulting in an unresponsive state.

Read Also:

  1. 0x80073712
  2. How To Enable Adobe Flash Player
  3. How to Change Brightness on Windows 10

Common Symptoms of the Error

When you encounter the “Outlook Not Responding” error, you may experience the following symptoms:

  1. Freezing or Hanging: The primary symptom is Outlook freezing or hanging, making it impossible to use the application.
  2. Delayed Responses: Even if Outlook eventually responds, it may do so slowly, leading to delays in sending emails, accessing folders, or performing other tasks.
  3. Error Messages: You may receive error messages like “Outlook is not responding” or “Outlook has stopped working.”
  4. Frustration: Users may feel frustration and inconvenience, especially when important emails or tasks are pending.

Now that we understand the symptoms, let’s explore the potential causes of the “Outlook Not Responding” error.

Possible Causes of the Error

To effectively troubleshoot and resolve this error, it’s crucial to identify its underlying causes. Here are some common reasons behind the “Outlook Not Responding” error:

  1. Large Data Files: A significant factor can be the size of your Outlook data files (PST or OST). When these files grow too large, Outlook may struggle to handle them efficiently.
  2. Add-Ins: Third-party add-ins or extensions integrated into Outlook can sometimes conflict with the application, causing it to become unresponsive.
  3. Outdated Outlook Version: Using an outdated or unsupported version of Outlook can lead to compatibility issues and errors.
  4. Corrupted Outlook Profile: Damage to your Outlook profile, where settings and data are stored, can cause the application to become unresponsive.
  5. Conflict with Antivirus Software: Some antivirus programs may interfere with Outlook’s operation, resulting in the error.
  6. Server Issues: Problems with your email server or network connection can also contribute to Outlook not responding.

Now that we’ve identified the potential causes, let’s explore the solutions to fix the “Outlook Not Responding” error:

Methods to fix the Outlook Not Responding Error:

This email program by Microsoft is infamous for the various errors it poses on computer systems. Despite being the chief mail managing application of Microsoft, Outlook is prone to many errors, including the no-feedback issue.

The users might not be able to find the reason behind this abnormal activity. Here are the probable causes for such an error arising in your Outlook application:

1 – Conflict with Outlook

One reason for Outlook Not Responding is that it might be interfered with by external applications or programs. If a third-party interruption is affecting this email application, it would probably show the not responding window and would not be able to run correctly.

2 – Large Mailbox

The Outlook program in PCs is not optimized for huge mailboxes. These are quite ordinary when you have your work profile synchronized with the application that might clock your mailbox.

3 – Corrupt Office Programs

As this application belongs to the Office Suite, the chances of problems affecting it are more. Microsoft’s Office package is prone to issues, where you will have to run troubleshoot and repair the errors to get rid of the problem.

4 – Antivirus Software

Protection programs such as antivirus and antimalware ensure the security of the system, but they might detect false positives for the programs and tasks that they cannot identify.

If the non-responding issue of Outlook is because of the security software in your system, you can disable it for the time being. However, if the antivirus software was not the actual cause of the issue is, it is better to enable it soon again.

5 – Outlook Add-ins

Add-ins is a famous feature in the Outlook application but can cause trouble easily. Even though such utilities help the user in carrying out certain tasks, they are prone to errors. Issues related to add-ins require efficient troubleshooting for identifying and clearing off the problem.

6 – AddData Redirection

In case the data folder of Outlook is directed to a Network Location, it might cause problems. The application may not get access to the data, preventing them from loading it.

For solving this, you will have to redirect the application data. These are the probable causes for the Outlook Not Responding issue.

However, before trying out any of the solutions, you have to back up all your data in the cloud to ensure that there is no loss of content. Also, remember to sign in as the admin on the system before moving on to the fixes.

7 – Corrupt User Profile

Every Outlook program works with a specific user profile. If the user profile is faulty, the application will have problems with working usually. In such cases, you have to clear the issue in your profile.


Read More:


How to Solve Outlook Not Responding Error

The possible solutions for Outlook Not Responding problem are as follows:

Method 1 – Update the Outlook Version

Microsoft would not support the old versions of applications and programs once the support period is over. The issue regarding Outlook is frequent in old versions of MS Office.

The older versions do not receive as many updates as the newer ones and thus cannot support most of the new features.

It is better to update the version of your Office suite to at least 2013. However, before the update, ensure that you have backed up the content for avoiding the loss of files.

Method 2 – Checking the Usage of Outlook by External Tasks

The most important thing to check if your Outlook application is not responding is to see if it is already working in the background.

If Outlook is running a task or a third-party application is using it, there will be issues in responding. In such a situation, if you try to run Outlook, a message displays saying that the application is busy.

It is because the tasks that you have given to the application conflicts with each other. Therefore, you have to wait until the first task finishes.

You can verify if the first task is over by navigating to the taskbar and checking the status of Outlook. Once the task is complete, you can launch the application. Another method is to go to the task manager and see if any external applications are making use of Outlook.

Method 3 – Keep Outlook in Safe Mode

Office suite offers a safe mode where you can run programs without interferences from outside factors such as add-ins. When you open Outlook in safe mode, it will launch the application with the drivers that are necessary and avoids all the additional features.

With this, you can get rid of the faulty modules that were causing problems to Outlook, and get it working perfectly. Therefore, use the application in safe mode and try to find out the error by troubleshooting. For enabling the safe mode, carry out the following instructions –

Step 1 – Firstly, click the Windows + R combination keys to open the run dialog box.

Step 2 – Enter the words “Outlook/safe” and press, OK.

Step 3 – A window appears and asks you to choose the profile you want to open. Choose the profile and press the Enter key.

Step 4 – After this, try to launch Outlook and check if it runs properly.

Method 4 – Repair Outlook

In most of the cases where the Outlook application does not respond, it is because the installation was not proper. There would be some files missing or corrupt at the time of installing the MS Office.

If there are modules missing from the Office package, single applications like Outlook will not be able to perform well. With this procedure, we will attempt to repair the issue by using the application manager.

Step 1 – Firstly, open the run dialog box by pressing Windows + R.

Step 2 – Enter the keyword “cpl” and hit OK.

Step 3 – When the application manager opens, find Microsoft Office and right-click on it. Then, choose Change.

Step 4 – From the window that appears, click on Repair and hit Continue.

Step 5 – Follow the prompts that display on the window and restart the system after finishing the process.

Method 5 – Repair Outlook Files

While importing files from Outlook, you might encounter faulty or incomplete files. It is mostly during the transmission that files undergo corruption and errors. This method tries to find the faulty files and repair them with the automatic repairing feature.

Step 1 – Open the Windows Explorer by clicking Windows + E.

Step 2 – Go to C:\Program Files (x86) \Microsoft Office\root\Office16

Step 3 – Navigate to .exe and right-click on the entry. After this, choose the option that says Run as administrator.

Step 4 – In the window that appears, hit on Browse and select the .pst file for scanning.

Step 5 – Select the Start option to initiate the scanning process. If any corruptions or faults are present, you will receive information regarding them. Even when the scanner detects minor errors, it is advisable to fix them immediately.

Step 6 – Choose the Repair option to fix the faulty files. Before this, check the box that prepares a backup for all your files to ensure that you do not lose anything from the system.

Step 7 – Once the repair is complete, restart the computer and check is the problem persists.

Method 6 – Update Windows and Outlook

Microsoft demands updates to clear off bugs and errors and adds certain features that your system did not have previously. It is better to update the operating system and programs as soon as the system prompts you.

However, before updating, it is advisable to backup your content to avoid any mishaps. You have to close all the background activities and make the system completely free of other tasks before starting the update process.

Also, remember to restart the system after completing the update, for applying the modifications.

Step 1 – Firstly, click the Windows + S combination keys and enter the word “update” in the box that appears.

Step 2 – When the update settings window opens, select the Check for updates This scans the device for the pending updates and lists it down. If updates are available, complete the process by following the prompts on the screen.

Step 3 – After finishing the update process, restart the system.

Step 4 – When the update for Windows is over, you have to update Outlook. Go to the Outlook application and select the File.

Step 5 – Choose the Office Account and select Update options. After this, click on Update now.

Step 6 – With this, the available updates will initiate the installation process.

In the new versions of Windows, Outlook update is incorporated with Windows update. Therefore, you need not update the application separately. The Windows update would install new features of all its component packages, including the MS Office and Outlook.

Method 7 – Remove Email Accounts

The email accounts that are included in your Outlook application will get automatically synchronized to the system. Thus, everything shared via the mail, including the media files, will be available on the computer.

Therefore, if any of the accounts are corrupt or contain faulty files, the Outlook application stops responding. If the email accounts are creating problems in Outlook, it is better to delete them.

Step 1 – Firstly, press the Windows + R combination buttons and enter “control” in the box that appears. Click OK.

Step 2 – When the control panel opens, find the mail application by searching for it in the search bar.

Step 3 – As the result comes, click and open the application.

Step 4 – Under Mail Setup, select the Email Accounts.

Step 5 – Below the Email section, click on all email accounts and select the Remove option that appears above.

Step 6 – After deleting all your email accounts, exit the window by selecting the Close.

Step 7 – Finally, restart the system and check if the Outlook application responds.

Method 8 – Disable the Antivirus Software

Security software such as antivirus and anti-malware ensure the security of the system, but they might detect false positives for the programs and tasks that they cannot identify.

Such software safeguards the files in the system and does not allow other applications and software to cause changes to the files. Therefore, even if the applications included in the Office Suite such as Outlook try to modify the files, the antivirus program restricts it.

They can also cause permission issues. If the non-responding issue of Outlook is because of the security software in your system, you can disable it for the time being. Another way is to try to update the security software and check if the problem solves.

However, if the antivirus software was not the actual cause of the issue is, it is better to enable it soon again. For disabling the system’s antivirus software, follow these instructions:

Step 1 – Firstly, go to the system’s Settings.

Step 2 – Select Update and Security.

Step 3 – Navigate to the left side and choose Windows Defender.

Step 4 – Below the Real-time protection option, disable the toggle button. With this, the Windows Defender will switch off.

Method 9 – Disable Add-ins

Another reason for Outlook Not Responding is because of the add-ins and other external features that are not supported by the application. Even though such utilities help the user in carrying out certain tasks, they are prone to errors.

Issues related to add-ins require efficient troubleshooting for identifying and clearing off the problem. For disabling the add-ins, you have to carry out the following steps:

Step 1 – Primarily, open the Outlook application and select the File option that appears on top of the window.

Step 2 – Choose the Options tab that appears on the left pane of the window.

Step 3 – After this, click on the Add-ins option, which shows the list of add-ins available. Select all the add-ins and disable them.

Step 4 – After finishing the process using the Task Manager, restart the system.

Step 5 – Finally, launch the Outlook application and check if the Outlook Not Responding problem persists.

Method 10 – Reinstall the Outlook Application

If none of the above methods solves the issue, you can reinstall the entire Outlook package and see if the problem fixes. As this application is attached to other Office applications, you have to stop working on all such applications while you carry out the reinstallation.

You must have your Office credentials before uninstalling the application, as you would need it later. After installing the new Outlook application, you have to use these credentials for signing in. The steps for reinstalling the Outlook package are as follows:

Step 1 – Firstly, press the Windows + R combination keys to open the run dialog box.

Step 2 – Enter the keyword “cpl” in the box that appears and hit the OK button.

Step 3 – When the application manager window opens, navigate to the Microsoft Office Then, right-click on the entry and click on the Uninstall option.

Step 4 – If you have the Office installation disk, insert it to the system, and install the package. Or else, you can download a new copy of the application by visiting the official website of Microsoft Office. Follow the prompts that display on the screen.

Step 5 – Once the installation process is complete, restart the device for applying the changes.

Step 6 – Finally, launch Outlook and check if Outlook works normally.


Read More –


Conclusion

Outlook is an essential application under the Office Suite that efficiently controls and manages emails. With this, you can easily synchronize different email accounts and include external websites as well. However, many users come up with complaints regarding the Outlook Not Responding.

This issue has several reasons and fixes. This article brings forth all the possible causes and solutions for the Outlook Not Responding, stuck at processing, stopped working, freezes, or hangs issue. I hope this has been helpful to you.

How To Fix ‘Chrome Won’t Open’ in Windows 10

Error
Error

Google developed and released a cross-platform web browser in 2008 for Microsoft Windows, known as Google Chrome. It is the most used active web browser platform since its release.

Though it was previously launched exclusively for Microsoft Windows it was later ported to Linux, macOS, iOS as well as Android and is set as the default browser. Although Chrome is an effective and most used web browser it has some flaws.

Many users have reported an error while trying to open Chrome in their Windows 10 device. They see a pop-up stating ‘Chrome won’t open in Windows 10’. Now if this is the case with your device then there is no actual reason to worry.

This article will focus on a few quick and effective solutions to this issue of Chrome. This can possibly occur because of some corrupt files and some malware prevailing in your device. So, here we start with our solutions and expect you to follow them according to their order.

Error
Error

Understanding the Chrome Won’t Open Error

Before we explore the details, let’s break down the error itself:

  • “Chrome” refers to the Google Chrome web browser, a widely used application.
  • “Won’t Open” indicates that the browser fails to start or launch when you attempt to open it.

In simple terms, the “Chrome Won’t Open” error occurs when Google Chrome is unresponsive and refuses to open, preventing users from accessing websites and online content.

Read Also:

  1. ERR_EMPTY_RESPONSE
  2. 500 Internal Server Error
  3. Origin Online Login Is Currently Unavailable

Common Symptoms of the Error

When you encounter the “Chrome Won’t Open” error in Windows 10, you may experience the following symptoms:

  1. No Response: The primary symptom is that clicking on the Chrome icon does not result in the browser opening or launching.
  2. Error Messages: You may receive various error messages, such as “Google Chrome has stopped working” or “Chrome won’t start.”
  3. Frustration: Users may feel frustrated and inconvenienced, especially if they rely on Chrome for their daily web browsing.

Now that we understand the symptoms, let’s explore the potential causes of the “Chrome Won’t Open” error.

Possible Causes of the Error

To effectively troubleshoot and resolve this error, it’s crucial to identify its underlying causes. Here are some common reasons behind the “Chrome Won’t Open” error in Windows 10:

  1. Corrupted Browser Data: Over time, Chrome’s data, including caches, cookies, and extensions, can become corrupted, leading to issues with opening the browser.
  2. Background Processes: Chrome may have background processes or tasks running that interfere with the browser’s ability to start.
  3. Conflicting Software: Certain software, such as antivirus or security programs, may conflict with Chrome’s operation and prevent it from launching.
  4. Corrupted Installation: A corrupted or incomplete installation of Chrome can cause startup problems.
  5. Hardware Acceleration: Hardware acceleration settings within Chrome may conflict with certain graphics cards, leading to startup issues.
  6. User Profile Corruption: Corruption in your Chrome user profile can prevent the browser from opening.

Now that we’ve identified the potential causes, let’s explore the solutions to fix the “Chrome Won’t Open” error:

How to Fix Chrome Won’t Open in Windows 10?

Here we are about to discuss the solutions which will help you to fix the issue Chrome Won’t Open Windows 10. So let’s carry on to find them out.

Before moving on to the solutions directly here are some workarounds that might save you time.

Step 1: Restart your device and cross-check whether the issue is resolved and Chrome works well.

Step 2: Try by disabling the Anti-virus or the firewall active in your device and check if it works.

Even after this, if Chrome doesn’t respond, its time to resort to the solutions.

Method 1: Rename Chrome and create a shortcut on your desktop.

Step 1: Open the File Explorer in your device by clicking on the Windows key and E key simultaneously on the keyboard.

Step 2: In the File Explorer Window, go to C:\Program Files (x86)\Google\Chrome\Application

Step 3: Now here is the application folder, right on the chrome icon, and select the rename option in the menu that occurs.

Step 4: Here, rename Chrome to Chromel.

Step 5: Now, right-click on Chromel, and in the menu that occurs select the > arrow next to Send to.

Step 6: In the drop-down menu that occurs select Desktop (create shortcut). This will create a shortcut of Chromel on your desktop.

Step 7: Shut down the file explorer Window.

Step 8: Now, on the desktop right-click on the Chromel icon and select rename.

Step 9: Rename it to Chrome once again.

Step 10: Hereby, double click on the Chrome shortcut icon on your desktop.

Alternative

Now Chrome should work properly on your device and if Google Chrome is already pinned to the taskbar of your device then follow the steps given below.

Step 1: In the taskbar, right-click on the Google Chrome icon and then select unpin from taskbar in order to unpin it.

Step 2: Now, double click on the Chrome shortcut that you have created.

Step 3: Now in the taskbar right-click on the Chrome icon and select Pin it to the Taskbar.

Try launching the Chrome browser now and even if the issue still exists you can try our next option.

Method 2: Restart Chrome process from the taskbar of your device

Step 1: Press the Ctrl key, Shift key, and Enter key simultaneously on your keyboard to launch the Task Manager Window on your device.

Step 2: Now under the Processes tab, search for Google Chrome in the list of applications.

Step 3: Once you locate it right-click on Google Chrome and select End Task.

These steps will end the Google Chrome process on your device. Retry to open your Chrome browser and check if it worked.

Method 3: Withdraw the user profile from the Google Chrome folder of your device

Step 1: Press Windows key and R key simultaneously on your keyboard to launch Run Window. Now type %USERPROFILE%\AppData\Local\Google\Chrome\User Data

Step 2: In the Run dialogue box and press ok.

Step 3: Here locate the Default folder and then right-click and select copy to copy the entire folder.

Step 4: Now, navigate to any location on your hard drive and paste the folder there. This will create a backup folder for the original one.

Step 5: Now get back to the user data folder and select the Default folder and delete it from your device.

Step 6: Restart your Chrome browser and open it.

Step 7: Now to reset Chrome, type chrome://settings/resetProfileSettings in the address bar and press Enter.

Step 8: Now a popup instruction will appear on the screen. Here, press Reset Settings. This reset Chrome.

Now check if the issue is resolved.

Method 4: Roll the in-built Malware and virus detector of Chrome Browser

Step 1: Open Chrome on your device and type chrome://settings/cleanup in the address bar and press Enter.

Step 2: In the settings window, click on the Find button next to find harmful software.

Now, the application will find the harmful software causing the error in your device. Launch the Chrome browser freshly and check if the issue still prevails.

Method 5: Remove DNS cache

Step 1: Press Windows key and R key simultaneously on your keyboard to launch Run Window.

Step 2: Type cmd and press the Ctrl key, Shift key and Enter keys simultaneously on your keyboard to launch the command prompt window.

Step 3: In the command prompt type the following commands one by one and hit Enter after each instruction.

NETSH INT IP RESET C:\RESETLOG.TXT

netsh winsock reset

ipconfig /flushdns

Step 4: Restart your PC and launch the Google Chrome and you’ll find that the issue is solved.

Method 6: Opt for Network Reset of your computer

Step 1: Press the Windows key and I key and simultaneously on the keyboard to open the settings window.

Step 2: Select Network and Internet.

Step 3: Now scroll to the bottom of the Status window and click on Network reset.

Step 4: Restart your PC.

Read Also:

  1. Printer Driver is Unavailable
  2. Error Loading Player No Playable Sources Found
  3. Digital TV Tuner Device Registration Application

Conclusion

The “Chrome Won’t Open” error in Windows 10 can be frustrating, but with a systematic approach to troubleshooting and the appropriate solutions, you can often resolve it and enjoy a seamless web browsing experience once again.

By following these solutions and maintaining a proactive approach to your browser’s performance and data management, you can efficiently troubleshoot and fix the “Chrome Won’t Open” error, ensuring that Google Chrome functions smoothly on your Windows 10 system.

These solutions will surely tackle the issue ‘Chrome won’t open in Windows 10’.

How To ‘Activate Showtime Anytime’ By ShowtimeAnytime.com/Activate

How to Activate Showtime Anytime By ShowtimeAnytime-Activate

Showtime, the premium cable and streaming network, offers a wide range of exclusive content, including hit TV shows, movies, sports, and more. To access Showtime’s extensive library on various devices, users often need to go through an activation process called “Activate Showtime Anytime.”

In this comprehensive guide, we will delve into the details of what Activate Showtime Anytime means, its significance, how it works, and step-by-step instructions on how to activate Showtime Anytime on different devices.

How to Activate Showtime Anytime By ShowtimeAnytime-Activate

Understanding Activate Showtime Anytime

Activate Showtime Anytime is a simple and user-friendly process that allows Showtime subscribers to access their favorite content on various devices such as smart TVs, streaming media players, mobile devices, and more.

This activation is required to ensure that users can enjoy Showtime’s exclusive shows and movies seamlessly across different platforms.

Read Also:

  1. 0x80073712
  2. How To Enable Adobe Flash Player
  3. How to Change Brightness on Windows 10

Common Scenarios for Showtime Anytime Activation

Before we explore the activation process, let’s understand the common scenarios where you might need to use Activate Showtime Anytime:

  1. Smart TVs: If you own a smart TV and want to watch Showtime content on it, you will likely need to activate Showtime Anytime on the TV.
  2. Streaming Media Players: Devices like Roku, Amazon Fire TV, and Apple TV support the Showtime Anytime app but may require activation.
  3. Mobile Devices: To access Showtime content on your smartphone or tablet, you may need to activate the Showtime Anytime app.
  4. Web Browsers: If you prefer to watch Showtime on your computer, activating Showtime Anytime in your web browser is necessary.

Now that we understand the scenarios, let’s explore how to activate Showtime Anytime on different devices.

Things To Note

You can use Showtime Anytime on your smart TVs such as Amazon Fire TV, Android TV, Apple TV, Chromecast, Roku, and Xbox One. We have provided you with the essential info which you need to successfully use your Showtime Anytime.

The cable which you are using must be legally a part of the programs of Showtime Anytime. It should also have a legal license that permits to play the shows.

You must have successfully subscribed to the Showtime Anytime with your cable which you are using.

Last but not least, you must have created an account to register the Showtime so that you can successfully activate it and enjoy streaming.

Follow the steps given below to create your account in Showtime Anytime:

Step 1: To create your account, first of all, you have to open the official website of Showtime Anytime.

Step 2: Select the button Get Showtime Now.

Step 3: A list will appear to you from which you have to select your provider. There must be some options of video platforms and an option of Additional choices. If this option is not present in the list, you will be unable to make your account.

How To Activate Showtime Anytime on iPhone or Android

You can activate Showtime Anytime on your Android or iPhone with the application. This is the fastest method to activate it.

First of all, install the application in your device. The application for Android and iOS are separate, but the process of activation is the same for both. So just go to the process:

Step 1: Open the application Showtime Anytime.

Step 2: Click on the video which you prefer to play.

Step 3: Click on the option Play.

Step 4: After getting prompted, you have to select the streaming service.

Step 5: The activation code will be visible to you. Note it anywhere.

Step 6: Open any browser in your device and go through the link: showtimeanytime.com/activate

Step 7: Now, you have to log in.

An activation notification will pop up on your screen, which means you have successfully activated your account.

How To Activate Showtime Anytime on Apple TV

In case you are using an Apple TV and want to stream videos of Showtime Anytime on it then go through the steps that we have provided below:

Step 1: First of all, turn ON your Apple TV and open any channel of Showtime Anytime.

Step 2: Now choose any program of your preference. Then press on Play.

Step 3: A list will have appeared to you from which you have to choose the TV which you are using.

Step 4: An activation code will be visible on your screen, which you have to note anywhere.

Step 5: Now open any of the browsers on your device and then visit the Website of Showtime Anytime.

Step 6: Now follow the instructions to activate it.

Step 7: Now, you have to sign up with your account.

Step 8: Follow the recommendation provided by the account of your TV provider.

Step 9: Now enter the activation code which you have noted in the 4th step.

A notification will pop up on your screen which tells you that you have successfully activated Showtime Anytime.

How To Activate Showtime Anytime on Android TV

This solution will work for a large range of Android TVs such as Sony, Philips, Razer, etc. So let’s go to check how to activate the Showtime Anytime shows on such kind of TV.

Step 1: First of all, open the channel of Showtime Anytime on your TV.

Step 2: Now choose any program of your preference. Then press on Play.

Step 3: A list will be appeared from which you have to select your provider.

Step 4: An activation code will appear on your screen, which you have to note down anywhere just to remember it.

Step 5: Open any of the browsers on your computer.

Step 6: Open the official website of Showtime Anytime and then go to the Activation page.

Step 7: Now go through the instructions you have provided to activate the Showtime Anytime.

Step 8: Now open another page Activation Devices to activate your device.

Step 9: A notification will pop up on your screen, which tells you that you have successfully activated Showtime Anytime.

How To Activate Showtime Anytime on Roku

You can also enjoy the streaming of Showtime Anytime on your Roku device. So let’s have a look at how to activate Showtime Anytime on your Roku.

Step 1: First of all, turn ON your Roku and open any channel of your Showtime Anytime.

Step 2: Now go to the Menu option and then select the option Activate.

Step 3: A list will be appeared from which you have to select your provider. You will be unable to activate if the list is not present in your device.

Step 4: An activation code will appear on your screen, which you have to note down anywhere just to remember it.

Step 5: Open any of the browsers on your computer.

Step 6: Open the official website of Showtime Anytime and then go to the Activation page.

Step 7: Now go through the instructions you have provided to activate the Showtime Anytime.

Step 8: Now open another page Activate device and follow the instructions provided by the account of your provider.

Step 9: Now enter the code which you have written previously.

How To Activate Showtime Anytime on Xbox One

If you want to enjoy the streaming of Showtime Anytime on your Xbox One device, then go through the below-mentioned steps:

Step 1: First of all, switch ON your device.

Step 2: open any channel of your Showtime Anytime.

Step 3: Now go to the Menu option and then select the option Activate.

Step 4: A list of providers will appear on your screen from which you have to choose your provider.

Step 5: An activation code will appear on your screen, which you have to note down anywhere just to remember it.

Step 6: Open any of the browsers on your computer.

Step 7: Open the official website of Showtime Anytime and then go to the Activation page.

Step 8: Now follow the instructions provided to you.

Step 9: Open another page Activate Devices and then put the password and user Id of your provider.

Step 10: Now enter the Activation code which you have written in an earlier step.

Step 11: A notification will pop up on your screen, which tells you that you have successfully activated Showtime Anytime.

Read Also:

  1. ERR_QUIC_PROTOCOL_ERROR
  2. Kernel Security Check Failure
  3. MSVCP100.Dll
  4. Origin Online Login Is Currently Unavailable

Conclusion

Activate Showtime Anytime is a straightforward process that allows Showtime subscribers to enjoy their favorite content on various devices seamlessly.

Whether you prefer watching on your smart TV, streaming media player, mobile device, or web browser, linking your Showtime account using the unique activation code ensures an enjoyable viewing experience.

With access to Showtime’s exclusive shows, movies, sports, and more, you can dive into a world of premium entertainment at your convenience.

6 Ways To Fix ‘ERR_QUIC_PROTOCOL_ERROR’ in Chrome

Error
Error

Google Chrome is one of the most popular web browsers in the world, known for its speed, security, and user-friendly features.

However, like any software, Chrome is susceptible to errors that can disrupt your browsing experience. One such error is the “ERR_QUIC_PROTOCOL_ERROR,” which can be frustrating for users.

In this comprehensive guide, we will explore the details of the ERR_QUIC_PROTOCOL_ERROR in Chrome. We’ll explain its significance, potential causes, and effective solutions to help you resolve this issue and enjoy seamless browsing on the Chrome browser.

Error
Error

Understanding the ERR_QUIC_PROTOCOL_ERROR

The ERR_QUIC_PROTOCOL_ERROR is an error message that you may encounter while using Google Chrome to browse websites. It is associated with the QUIC protocol, which stands for Quick UDP Internet Connections.

QUIC is a transport layer protocol developed by Google to improve the security and performance of web communication. It is designed to replace the traditional Transmission Control Protocol (TCP) used by most websites.

When you see the ERR_QUIC_PROTOCOL_ERROR, it means that there was an issue while establishing a connection to a website using the QUIC protocol. This error typically prevents you from accessing the website and may appear as a page with a message like “This site can’t be reached” or “Aw, Snap!”

Read Also:

  1. ERR_EMPTY_RESPONSE
  2. 500 Internal Server Error
  3. Origin Online Login Is Currently Unavailable

Common Symptoms of the Error

Before we delve into the causes and solutions, let’s take a look at some common symptoms associated with the ERR_QUIC_PROTOCOL_ERROR:

  1. Error Message: The primary symptom is the appearance of an error message that reads “ERR_QUIC_PROTOCOL_ERROR.”
  2. Inability to Access Websites: When this error occurs, you are unable to access the specific website or web pages affected by the error.
  3. Connection Timeout: Your attempts to load the webpage may result in a connection timeout or a blank page.

Now that we understand the symptoms, let’s explore the potential causes of the ERR_QUIC_PROTOCOL_ERROR.

Possible Causes of the Error

To effectively troubleshoot and resolve the ERR_QUIC_PROTOCOL_ERROR, it’s crucial to identify its underlying causes. Here are some common reasons behind this error in Chrome:

  1. QUIC Protocol Issues: The QUIC protocol may encounter issues or conflicts while trying to establish a secure connection with the website.
  2. Network Connection Problems: Network-related issues, such as packet loss, high latency, or a weak Wi-Fi signal, can disrupt the QUIC protocol’s operation and trigger the error.
  3. Browser Cache and Cookies: Corrupted or outdated browser cache and cookies can sometimes interfere with the QUIC protocol, causing the error.
  4. Firewall or Antivirus Software: Certain firewall or antivirus software may block QUIC protocol connections, mistakenly identifying them as threats.
  5. Browser Extensions: Incompatible or outdated Chrome extensions can conflict with the QUIC protocol, leading to connection errors.

Now that we’ve identified the potential causes, let’s explore the solutions to fix the ERR_QUIC_PROTOCOL_ERROR:

How to Fix ERR_QUIC_PROTOCOL_ERROR in chrome

The solution for fixing the ERR_QUIC_PROTOCOL_ERROR is mentioned beneath. May be one of them will work for you. Let’s have a look on them.

Method 1: Using the chrome://flags Command

Step 1: Go to the Chrome browser window. Open a new tab.

Step 2: Enter the command “chrome://flags” in the address bar. This will navigate you to the settings menu.

Step 3: A notification/ message box will pop up saying “Careful; these experiment may bite”. That will cause to issue a warning such as “experimental features”. Don’t panic! This procedure is safe and secured. Thus, ignore it and go ahead.

Step 4: Once the above step is completed successfully, scroll down to find the Experimental QUIC protocol feature. Or else, in case you are not able to find it, press CTRL+F key.

Step 5: Navigate to the “Experimental QUIC protocol” in the box and press enter.

Step 6: Now select the Disabled option from the drop down box. Relaunch the chrome once it is accomplished. The error will get disappear.

Method 2: Disabling Browser Extensions

As we have mentioned above, the interference of third party can affect the work efficiency of the Google Chrome. We should disable it in order to resolve them.

Step 1: Go to the Chrome window. Open a new tab.

Step 2: Enter the command “chrome://extensions” in the address bar. And press Enter.

Step 3: Once it is done, navigate to the Extensions. Disable all other extensions that are not required.

Step 4: As the above steps are accomplished then Reboot the computer. Now click on the Google Chrome browser window. Open a new tab in the browser window. Verify if the error still prevails.

Note: If you are still facing the problem even after disabling the connection, then it is advisable to disable the third party extension from the root. Then, click on the Google Chrome browser window. Open a new tab in the browser window. Verify if the error still prevails.

Method 3: Resetting the Browser

Step 1: Go to the browser window. Click on the three vertical dots in the top right corner. A drop down menu appears. Then select Settings.

Step 2: Scroll down until you get the Advanced option. Now select it in order to expand it.

Step 3: Once the above step is accomplished, click on the Reset option and then on Relaunch Chrome.

Note: As data will be permanently deleted once you click on the Reset option, it is advised, to always ensure to save all the tabs and links. Then, click on the Google Chrome browser window. Open a new tab in the browser window. Verify if the error still prevails.

Method 4: Checking the Proxy or Firewall Settings

Step 1: Press Windows key + R and enter the command “inetcpl.cpl”. Navigate through the Internet Properties section.

Note: If this works for you then good. Or else, search for “Control Panel” in the start or cortona search bar. Now, select the “Internet Options” or the “Network and Internet”option.

Step 2: Now click on the “Connection” option. Select “LAN Settings”. Always ensure that there is no issue regarding Firewall or Proxy Browser. If you encounter any errors then fix those first.

Step 3: Now uncheck the option called “Use a Proxy Server for your LAN”. Once it is done, check the “Automatically detect settings” option.

Step 4: Finally, Click on the option “OK” then “Apply” and then “Restart” the computer.

Note: Click on the Google Chrome browser window. Open a new tab in the browser window. Check if the error still prevails.

Method 5: Temporarily Disabling the Firewall Settings

Step 1: The first and foremost step is to locate any Anti-virus programme present in the system Tray (which is depicted by an upward facing arrow). Now, Right click on it and Select “Disable”.

Step 2: Now choose and click on a short period for the disabling of the anti-virus programme.

Step 3: Then open the Chrome browser to inspect whether the error is solved or not.

Step 4: If the issue is yet not solved, then navigate to “System and Security” setting on the computer by searching for it in the search bar or Cortona. Or you can press Window key + I to open the “Control Panel” and then select it.

Step 5: Now Select the “Windows Firewall” option. Then select the “Turn Windows On or Off” option from the panel present on the Left hand side.

Step 6: Now Select the option that turns off the firewall and then “Restart” the computer.

Note: Always inspect and ensure to turn on the Windows Firewall by following the same steps mentioned above irrespective of whether the issue is solved or not. Then, click on the Google Chrome browser window. Open a new tab in the browser window. Verify if the error still prevails.

Method 6: Scan for Viruses 

A Computer Viruses is a type of malicious computer program which is when executed, it replicates itself and affects parts of the computer. As we all know, have always been a threat to  the computer system.

It not only affects your computer system but also has the capability to steal privacy passwords, documents, pictures, videos and can send it to the creator of the virus. Often the term virus id misunderstood as Malware.

Let’s get these things clear. Malware is a malicious computer virus with harmgul software but virus is only a computer program. The different types of malware are worms, keyloggers, spyware, rootkits, Trojan horse, bootkits.

Step 1: Search in the search field for “Microsoft Security Essentials”. And then click on Microsoft Security Essentials.

Step 2: A new window pops up. Choose Full to scan your computer completely and thoroughly.

Step 3: Now, click on the Scan Now. Then Scan your computer thoroughly.

Step 4: Once you have successfully completed the steps mentioned above, Check if the problem is fixed or not.

Now, talking about Mac Books, there are a few chance of facing the ERR_QUIC_PROTOCOL_ERROR. But still you want to be ensure about it then you can scan with your antivirus installed in your Mac Book.

Method 7: Reset Chrome 

I know you have already followed each and every step carefully for disabling QUIC protocol and clearing cache but you have failed then you absolutely need to choose a bit more different and drastic procedure.

Here we are back with another method which is to reset the browser. To do the same follow the steps mentioned below –

Step 1: Go to your Browser window which is Google Chrome. Now click on the three vertical dots situated on the right top corner.

Step 2: A drop down menu appears. From that select Settings. On that page scroll down until you find Advanced. Now click on it to expand the settings of advanced options.

Step 3: Scroll down again to find Reset at the bottom of the page. A message will pop up with a warning that “All the temporary files as well as extensions will be removed.” As no harm will be caused to your computer system so this message is ignored.

Step 4: So what are you waiting for/ Click on the Reset button on the monitor. Now Restart the Chrome Web Browser. Open a new tab in the browser window. Verify if the error still prevails.

Method 8: Disable VPN

This has recently came to our prior notice that many of the Chrome users are facing this common issue of connection problem and every solution available on the internet is not working proficiently for them.

The VPN and the Proxies interfere with the speed of the internet connection as they bypass the default service provider’s connection. VPN can cause issues and instability including the error of ERR_QUIC_PROTOCOL_ERROR.

A better method to verify whether this extension of VPN is impacting the internet speed and causing issues. This can be done by using a different web browser. Let’s try by disabling the VPN. After disabling you will be able to bring results.

If the issue is solved by disabling the VPN then it is proved that the cause of the error ERR_QUIC_PROTOCOL_ERROR was none other than VPN. We will suggest you to use premium or you can go for reliable VPNs such as VyprVPN and ExpressVPN.

Read Also:

  1. Printer Driver is Unavailable
  2. Digital TV Tuner Device Registration Application
  3. Error Loading Player No Playable Sources Found

Conclusion

Now, as we have arrived to the conclusion after reading all our methods, we really hope that the procedures and methods mentioned above will certainly work for you. We have tried our best to elaborate the main issue, causes and effects.

Last but not the least, ERR_QUIC_PROTOCOL_ERROR is usually caused due to issues related to Web Browser. The first and foremost step you ought to do is to check for connectivity and internet speed of your network.

Always ensure that you stay connected to the internet throughout the whole procedure. Take care of all the extensions which needs to be attached for connectivity. Also, you need to take care that no connection gets disconnected during the whole procedure.

I know the procedures mentioned above might have solved most of the problems. If there are still some people who come in the category of their error ERR_QUIC_PROTOCOL_ERROR not being solved then you can go for other websites to find a cure to your injury.

We would like to hear your feedbacks and FAQs on our site. Stay tuned for more such content. We will be right back very soon with another informative yet interesting article. Till then keep supporting us on our social platforms.