Online gaming has become a global phenomenon, providing entertainment and competition to millions of players worldwide. However, the online gaming experience is not always without its challenges.
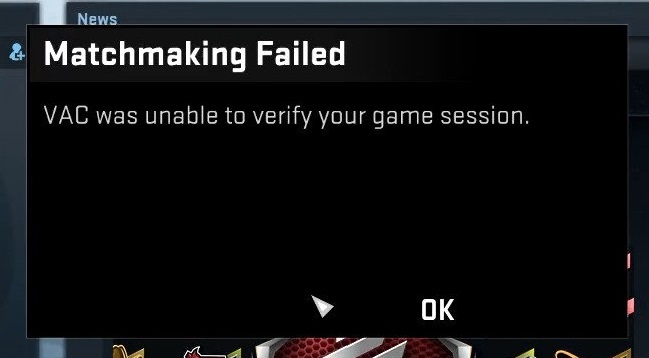
One such challenge is encountering the “VAC Was Unable To Verify The Game Session” error, which can disrupt your gameplay and leave you wondering what went wrong.
In this comprehensive guide, we will delve into the details of the “VAC Was Unable To Verify The Game Session” error, its significance, potential causes, and effective solutions to help you enjoy a smooth and uninterrupted gaming experience.

Contents
Understanding the “VAC Was Unable To Verify The Game Session” Error
The “VAC Was Unable To Verify The Game Session” error is a common issue that players encounter when playing games that utilize the Valve Anti-Cheat (VAC) system.
VAC is an anti-cheat software developed by Valve Corporation, and it’s designed to ensure fair play and prevent cheating in online multiplayer games on the Steam platform.
When this error occurs, it signifies that the VAC system was unable to verify the legitimacy of your game session, leading to restrictions or temporary bans on your account.
Read Also:
Common Symptoms of the Error
Before we delve into the causes and solutions, let’s take a look at some common symptoms associated with the “VAC Was Unable To Verify The Game Session” error:
- Error Message: The primary symptom is the appearance of an error message that explicitly states, “VAC Was Unable To Verify The Game Session.”
- Kicked from Game: You may be kicked out of your current game session or match when this error occurs.
- Matchmaking Restrictions: In some cases, the error may result in matchmaking restrictions that prevent you from joining certain game modes or servers.
Now that we understand the symptoms, let’s explore the potential causes of the “VAC Was Unable To Verify The Game Session” error.
Possible Causes of the Error
To effectively troubleshoot and resolve this error, it’s crucial to identify its underlying causes. Here are some common reasons behind the “VAC Was Unable To Verify The Game Session” error:
- Interference from Third-Party Software: Certain third-party software, such as game-enhancing applications or cheats, can interfere with the VAC system and trigger this error.
- VAC System Integrity Issues: If the VAC system files or components become corrupted or damaged, it can lead to verification errors.
- Network or Connection Problems: Unstable or slow network connections, as well as firewall or router settings, can cause issues with the VAC verification process.
- Outdated Game or Steam Client: Using an outdated game client or Steam client can result in compatibility issues with the VAC system.
Now that we’ve identified the potential causes, let’s explore the solutions to fix the “VAC Was Unable To Verify The Game Session” error:
How to Solve VAC Was Unable to Verify the Game Session in Windows 10
Method 1 – Log Out of Steam and Log in Again
First of all, it may happen that the operating system or the file management system of your computer alters some of the configuration files. It will result in VAC being unable to verify them, and it throws the VAC was unable to verify the game session error.
If that is the case, just logging out of steam and logging in again will solve the VAC Was Unable to Verify the Game Session problem. When you log out, all configuration files are deleted, and when you again with the same credentials, they are recreated.
Follow the steps, enumerated below,
Step 1: Firstly, select Steam from the taskbar or desktop or Start menu and launch it.
Step 2: Following, when Steam is up and running, click on the profile name to see a drop-down box appearing. Furthermore, click on the Log Out of My Account option and follow the instructions that are displayed on the screen.
Step 3: Lastly, Log in again using your credentials. In case you forgot your password, use the forgot password option to reset the password.
This simple method of logging in again is found to fix the VAC was unable to verify the game session error in most cases, if the error was caused by some lousy configuration files or settings files. It is also noteworthy that re-installing the game will not solve the problem. The same configuration files will load after reinstalling.
Also Read:-
Method 2 – Reboot Your Computer
Suppose that the files that need to be verified by VAC are being accessed by some system program or utility like the antivirus software. In that case, the operating system will deny VAC from accessing the file to avoid read-write conflicts. If this issue causes VAC, restart your computer.
Follow the steps to reboot your computer:
Step 1: Click on the start button to see the start menu or press the Window key.
Step 2: Click on the power button to select reboot (or restart) from the start menu.
Step 3: The system may ask to close some applications, prevent data loss save and close them, and restart the system.
Now you can open the game. See, the VAC Was Unable to Verify the Game Session error is fixed.
Method 3 – Verify Integrity of the Game Files
Sometimes, your game file is corrupt. You may give a check to verify the integrity of the installed game files to ensure that they follow the features prescribed by the game manufacturer and the steam distributors. To check the integrity of the files, follow these steps:
Step 1: Launch Steam on your device.
Step 2: In Steam, go to the Library tab to find the installed games on your system.
Step 3: Find the game which is facing VAC was unable to verify the game session error and right-click on it and Select properties.
Step 4: Click on Verify integrity of the game files option in the local tab.
Step 5: This process may take time depending on your device parameters.
After the integrity check is over, run the game again. Your game must be running well. If your integrity check result was positive, replace the game files.
Read Also:
Method 4 – Repair the Steam Client
There is a chance that the Steam client itself may have some damaged or broken files. It will also lead to a VAC was unable to verify the game session error.
Follow the steps given below to fix the issue:
Step 1: First of all, launch windows command prompt
Step 2: Then, copy-paste the following command in your cmd. Importantly, we also need the double quotes:
C:\Program Files (x86) \Steam\bin\SteamService.exe /repair
Step 3: Be sure to replace the path of SteamService.exe if you have saved it in a different location.
Step 4: Run the command, and after the repair is complete, restart your device.
Step 5: Lastly, open the Steam application after the restart. You may download some files for updates or configuration. Login to steam if prompted.
Lastly, open the game. The VAC Was Unable to Verify the Game Session error is fixed.
Method 5 – Eliminate Game Directory from Antivirus Scan
VAC may be denied access to the game files if the antivirus scan is running in the background. To prevent this, you can whitelist the game and steam directory and exclude them from automatic antivirus scanning.
The steps to do this will be different for different antivirus software. You have to do it according to your antivirus software. Usually, it involves going into the settings and adding the game directory to whitelist.
Read More:
- System Service Exception (0x0000003b)
- Windows Error Code 0x80070570
- Error 0x800705b4 in Windows Update and Windows Defender
Conclusion
Hopefully, this article helped you to solve the VAC was unable to verify the game session error. Now go ahead and enjoy your game!


