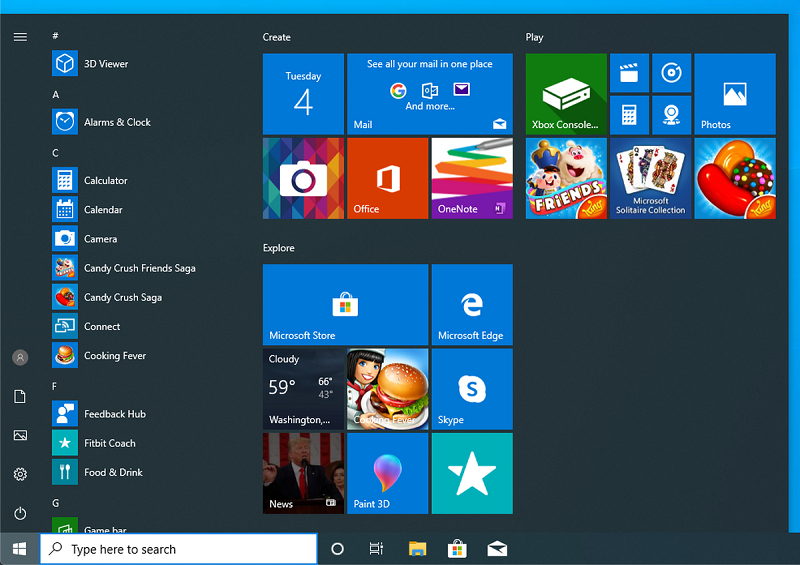
Every windows operating system has a Start Menu button. It is one of the UI components of Windows. But this start button has some troubles while operating. Start Menu on Windows sometimes unable to work properly and then the user gets irritated to work on the system.
A lot of time is going to waste if Start Menu isn’t working. Mostly, users reported that the Windows 10 Start Menu Not Working properly and disappointed with this issue.
Also, users were disappointed due to a lack of Start Menu feature when Windows 8 was launched. Later, Windows 10 came with this feature.
Users reported the same problem that the Start Menu is not working properly. Let us know the methods that can help to fix the Windows 10 Start Menu Not Working issue.

Contents
- 1 How to Fix Windows 10 Start Menu Not Working Error
- 1.1 Method 1: Check for Windows Updates
- 1.2 Method 2: Use the PowerShell to Fix This Issue
- 1.3 Method 3: Sign Out of Your Account
- 1.4 Method 4: Restart the Windows Explorer
- 1.5 Method 5: Use Command Prompt
- 1.6 Method 7: Create New Values in Your Registry
- 1.7 Method 8: Enter Safe Mode
- 1.8 Method 9: Create A New User Account
- 2 Conclusion
How to Fix Windows 10 Start Menu Not Working Error
Method 1: Check for Windows Updates
After users report the issue, then Microsoft can find a way to fix the issue of the Start button working, then it can be released through Windows Updates. So, you need to Update the system Windows at regular times when Updates are available.
If your system doesn’t show the Updates automatically, then you need to check the Updates are available or not by manually. For checking the Updates manually, follow the simple instructions that mentioned below for this method:
Step 1: Click the Windows button + I, it can directly navigate to Settings.
Step 2: Now go with the option Update & Security.
Step 3: On showing options under the Windows Update, click on the option Check for updates.
After clicking on it, your Windows software can go for the search to find the Updates. If any updates are available, then those updates can be automatically downloaded in the system background.
Now, once again do work anything on your system to find whether the issue of Start Menu is resolved or not.
Read Also:
Method 2: Use the PowerShell to Fix This Issue
If you are unable to wait for the updates to fix the Start menu issue, you can try this method to fix the issue yourself. But remember this method can resolve your problem temporarily, but not permanently.
If you want to implement this method to fix the issue of Start menu button temporarily until getting Windows Update, follow the instructions that mentioned below to fix the issue:
Step 1: At first, Right-click on the Start Menu.
Step 2: Now go with the Windows PowerShell.
Step 3: Remember this point, that you need to run the PowerShell as an administrator. for this, click the Windows button + S and then type the PowerShell and hit the enter key. After it, PowerShell can run as an administrator.
Step 4: Now copy the following code and paste it into PowerShell.
Get-AppXPackage-AllUsers

{Add-AppxPackage-DisableDevelopmentMode-Register “$($_.InstallLocation)A ppXManifest.xml”}
Step 5: Now click the enter key to run it.
After this process completes, your start Menu option should work properly, to know the issue is resolved or not, check it once.
But remember on your mind, that this method is useful to avoid this issue temporarily. You need to execute this method again and again when Start Menu works not properly or completely.
Method 3: Sign Out of Your Account
Sometimes, this issue may be raised due to your Microsoft account. So, you need to sign out the account on your system once and then sign in again. For sign out and sign in, follow the instructions that mentioned below:
Step 1: Type settings in the search bar and navigate to the option Settings.
Step 2: Now go with the Accounts option.
Step 3: Click on the option Your account.
Step 4: Now under your account, click on the Sign-out option.
Step 5: After Sign out, once Restart your system or wait for some time.
Step 6: Now again Sign-in into your account.
Now check the issue whether resolved or not.
Method 4: Restart the Windows Explorer
Many users found that the issue with the Start menu can be resolved by restarting the Windows Explorer. Because Windows Explorer has the Start menu as a part of it.
So, if you restart the Windows explorer, then automatically it forces the Start menu to restart. For restarting the Windows Explorer, follow the steps that mentioned below:
Step 1: Simply, click the Ctrl + Shift + Esc keys to open the Task Manager.
Step 2: Now find the Windows Explorer.
Step 3: After found it, Right-click on it.
Step 4: Now select the option Restart.
After restart the Windows Explorer, the Start Menu issue can be resolved. You can be able to work without any troubleshoots with the Start Menu. Also, remember this is also a temporary method, do you need to execute this method again and again if the issue is repeated.
Method 5: Use Command Prompt
Some Cortana files may be the reason for the improper working or not working of Start Menu. Many users also reported it.
They can avoid the issue not working of Start Menu by deleting the Cortana file which causes the trouble with Start menu. For deleting the Cortana files, follow the steps that mentioned below to fix the issue:
Step 1: Click the Windows key + X.
Step 2: Now select the option Command Prompt (Admin) from the list of options.
Step 3: After command prompt starts, run the following commands.
CD/d "%LOCALAPPDATA%PackagesMicrosoft.Windows.Cortana_cw5n1h2txyewy"
Taskkill /F /IM SearchUI.exe
RD /S /Q Settings
After execution of the above command prompts, the files will be rebuilt again and you can be able to operate the Start Menu properly.
METHOD 6: Modify Your Registry
Due to Dropbox, sometimes this issue can be raised. Dropbox may sometimes interfere with the Windows software. It may lead not only to this problem but also it can be a reason for the many troubleshoots in your system.
So, you need to avoid the problem with Dropbox to resolve the issue with the Start menu. For this method implementation, follow the instructions that mentioned below:
Step 1: Click the Windows key + R and hit enter key to enter into Regedit (Registry Editor).
Step 2: Now go with the following key on the left-side panel.
HKEY_LOCAL_MACHINESYSTEMCurrentControlSetServicesWpnUserService
Step 3: On the right-side pane, just click twice on the option Start (DWORD).
Step 4: Now change or set the value data to 4.
Step 5: Now click on the option OK.
After making the changes, once restart your system. Then changes are going to apply in your system Windows or Dropbox.
Now check the Windows 10 Start Menu Not Working is resolved or not.
Method 7: Create New Values in Your Registry
The Start menu issue might be occurred due to other problems related to the registry. If you want to avoid this problem, then you need to create a new registry value. For this method implementation, follow the instructions that mentioned below:
Step 1: Click the Windows key + R and hit enter key to enter into Regedit (Registry Editor).
Step 2: Now go with the following key on the left-side panel.
HKEY_CURRENT_USERSoftwareMicrosoftWindowsCurrentVersionExplorerAdvanced
Step 3: Now on the right-side pane, select the space box.
Step 4: Now select the option New.
Step 5: Now choose the DWORD (32-bit) value.
Step 6: Now enter the name of the new DWORD as follows:
EnableXamlStartMenu
Step 7: Now close the Registry Editor.
Step 8: Restart the Windows Explorer within the Task Manager, to apply changes in your Windows.
Now check the Windows 10 Start Menu either working or not to confirm the issue.
Method 8: Enter Safe Mode
Many users found that the issue of Start Menu working can be resolved by enabling the Safe Mode. So, you have to try this method to solve the problem with Start Menu. If you want to try this method, follow the instructions that mentioned below:
Step 1: Click the Windows key.
Step 2: Choose the option Power.
Step 3: Now hold down the Shift key.
Step 4: And then select the option Restart.
Step 5: On display menu, navigate to Troubleshoot option.
Step 6: Now go with the option Advanced options.
Step 7: In Advanced option settings, select the option Start-Up Settings.
Step 8: Under the Start-Up Settings, click on the option Restart.
Step 9: After it, different boot options are displayed on display. And choose the Safe Mode that you want to execute by the keys F4 or F5 or F6.
After entering into the Safe Mode, now check the Start Menu is working or not. And then restart the PC again and boot all to your account.
Also, remember that this is not a better method for avoiding the problems with Start Menu. This method may work sometimes only, but users reported that it may help if other methods could not resolve the issue.
Method 9: Create A New User Account
If your account corrupted or hacked, then it may lead to the problems with the Start Menu. So, you need to create a new user account. For creating the new user account, follow the steps that mentioned below:
Step 1: Navigate to the Settings of your system.
Step 2: Go with the option Accounts.
Step 3: Choose the option Family & other users.
Step 4: Under the Other users, click on the option Add someone else to this PC.
Step 5: And then choose the option “I don’t have this person’s sign-in information”.
Step 6: Now go with the “Add a user without a Microsoft account” option.
Step 7: Now, enter the required details like username, password, and more.
Step 8: Now sign- in into this account and switch to it.
If everything is good with a new account and check the problem is resolved or not. If it is resolved means just transfer all files and other documents to this account. And continue your profile with this account.
Read Also:
Conclusion
Above mentioned solutions are accurate and you can confidently implement them. I hope all you are easily understand the above methods. And also, the above methods recommended by the users. These methods are described within the simple steps and language.


